Orbito is a Multipurpose WordPress Theme especially designed for Agencies, Businesses, Brands, IT Solutions, Software Services, Startups, SEO, and all type of Technology Business and those who offer Consultency related services. Wadi Theme has beautifull and unique design that will be best suited for your online web presence. It has 100% responsive design and tested on all major handheld devices. Orbito comes with powerful features. Orbito is a clean responsive wordpress theme. It includes Elementor drag & drop builder plugins free with theme. The theme comes with the option of contact form to allow users to contact you. Orbito is fully compatible with latest version of plugins to allow you easy handling. The Orbito comes with one click demo and also more flexible features.
Intoduction
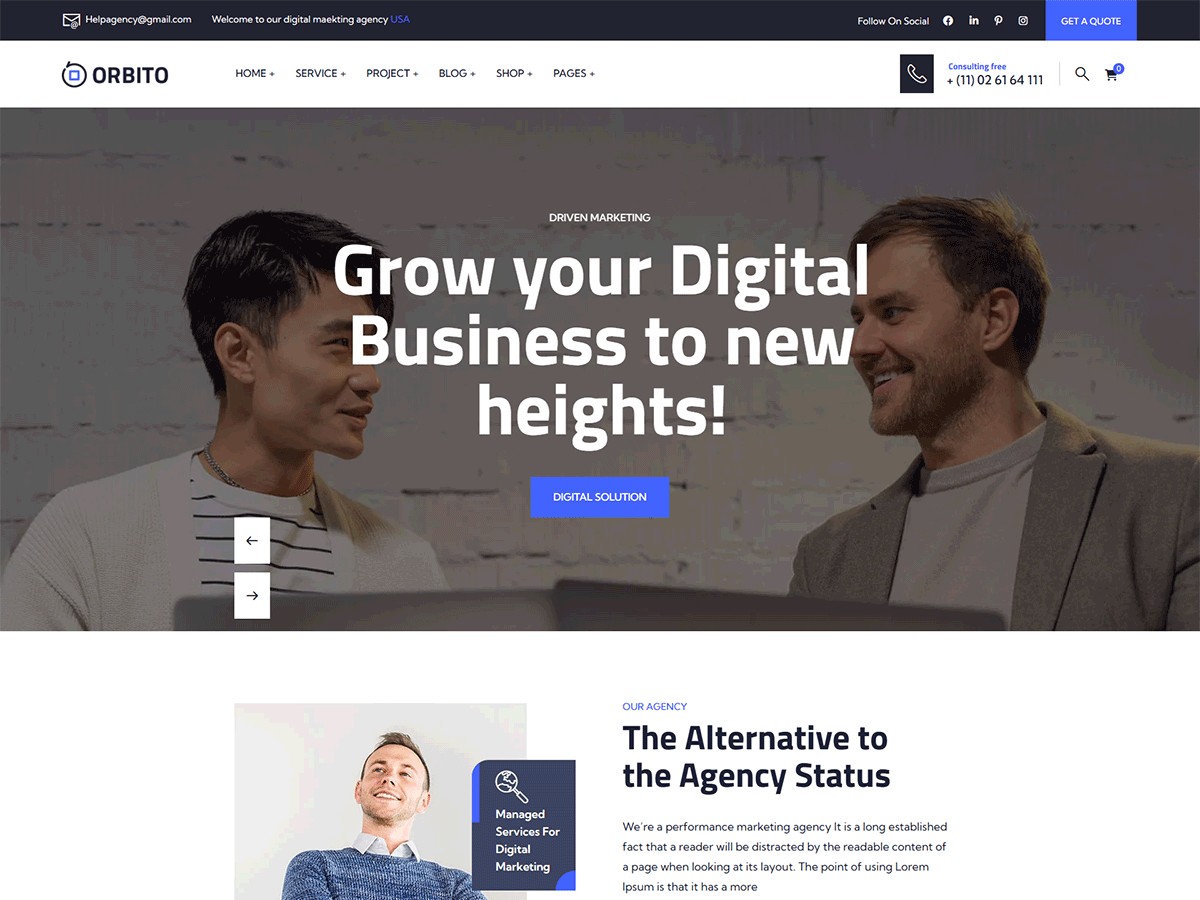
Orbito WordPress Theme
- By : uiuxom
- Email : uiuxom@gmail.com
Thank you for purchasing our theme. We are delighted to have you as one of our valued customers, and we are committed to ensuring your satisfaction with our products.
By purchasing this theme, you’re entitled to lifetime free updates and dedicated support directly from the author. Our goal is to make sure your experience with Orbito is smooth, enjoyable, and helps you build an amazing website with ease.
This documentation will guide you through every essential step — from installation to advanced customization. Please take a few minutes to read it carefully before starting your setup. Doing so will help you understand how the theme is structured and how to make changes properly. When you purchase Orbito from ThemeForest, make sure you’re logged into your Envato account and download the “All Files & Documentation” package.
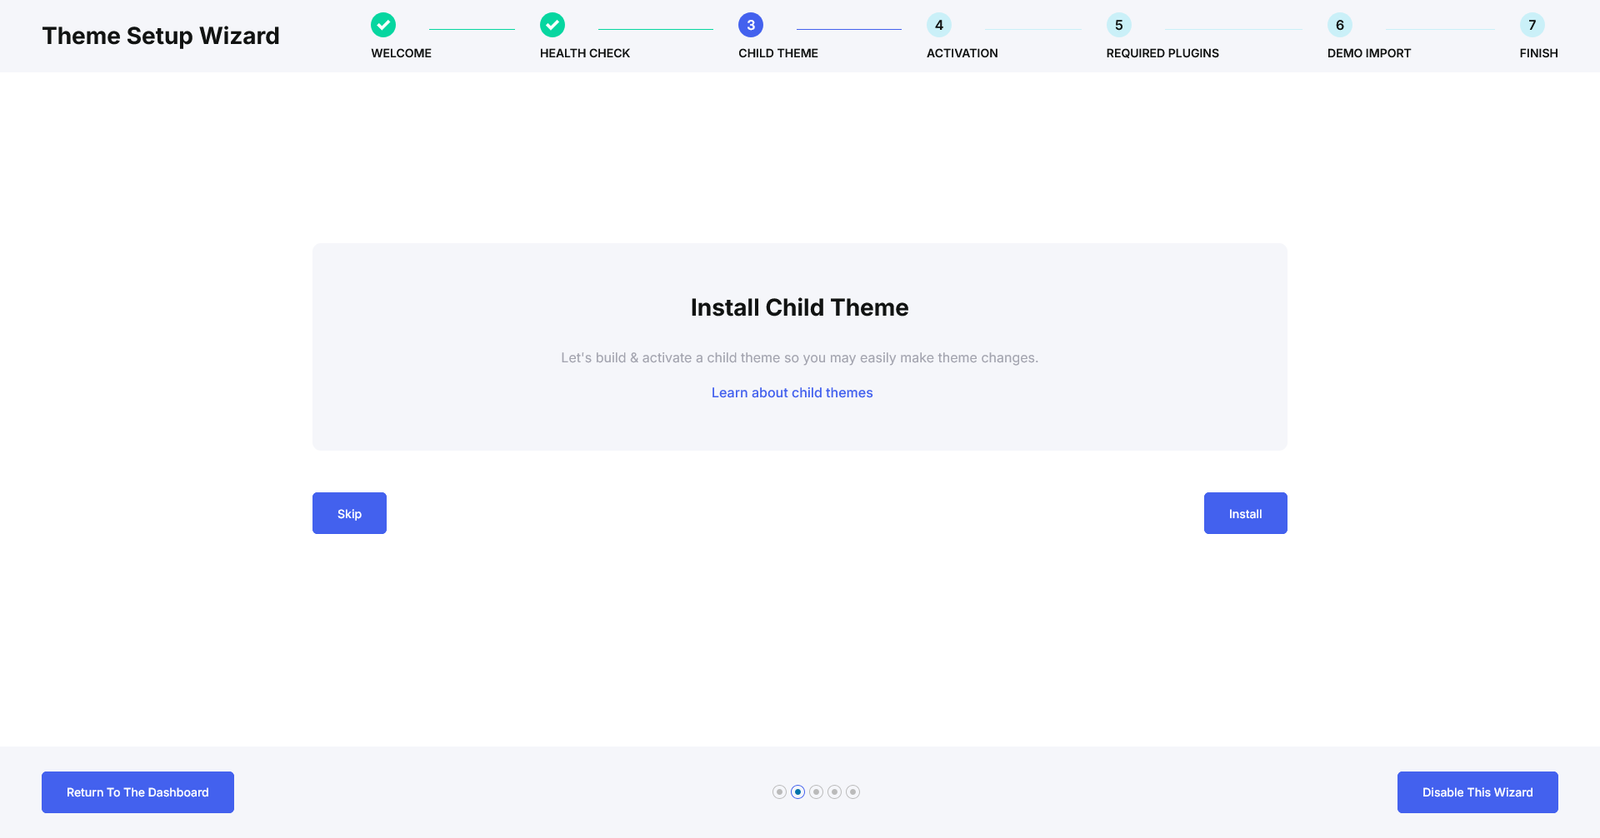
Upload and Activation
There are 2 ways to upload the theme. Please follow the given steps.
Step 1: Via Dashboard
- Log in to your WordPress dashboard using your username and password.
- Navigate to the Themes section under Appearance.
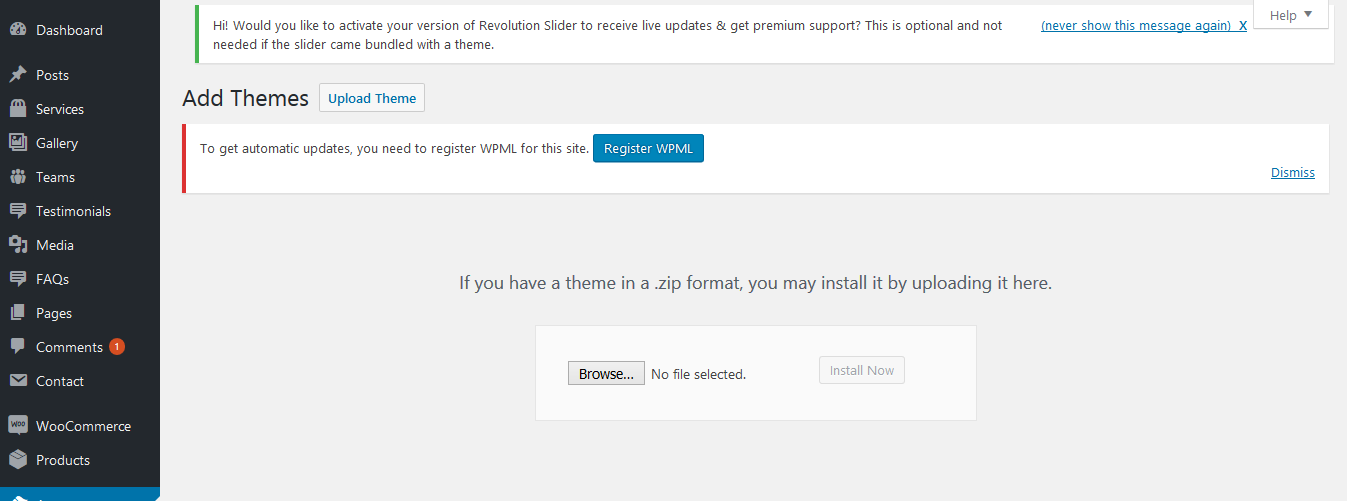
- Click the Add Theme button.
- Click the Choose File button to open your file browser.
- Select the theme’s ZIP file from your computer.
- Finally, click the Install Theme button.
Via FTP (Recommended)
- Extract the theme package downloaded from ThemeForest Orbito-wp-full.zip open the folder.
- Open any FTP aplication like Filezilla navigate to the directory of the Theme.
- For the file upload, pick Theme Files / Orbito.zip in the theme package downloaded from ThemeForest.
- Navigate to Appearance → Themes in your WordPress admin dashboard.
- Click Activate once the upload has finished and you're ready for the next step: Installing the Plugins.
Video Tutorial
Dummy Content Import
Server requirements
To use any of our WordPress themes, we recommend your host supports WordPress 6.3 or greater, PHP 7.4 or greater version (WordPress is now recommending PHP 7.4, read more), and MySQL 5.7 or greater version. For detailed PHP extension recommendations, see the Hosting Handbook.
We recommend that you contact your web hosting service provider to make sure that your server PHP configuration limits are as follows:
- memory_limit : 256 MB
- max_execution_time: 3600
- max_input_time: 3600
- post_max_size: 64M
- upload_max_filesize: 64M
- max_input_vars: 3000
Install the required plugins
After installing the theme, you need to install required plugins. You will see a notice for installing required plugins.
- Click on Begin installing plugins. Or go Appearance > Install Plugins.
- You will see list of plugin need to be installed. Now, check all plugins & select bulk options install and click Apply.
- All plugin will be installed. Now, Click on Return to Required Plugins Installer.
- You need to active plugins. Now, check all plugins & select bulk options Active and click Apply.
- Click on Return to the Dashboard.
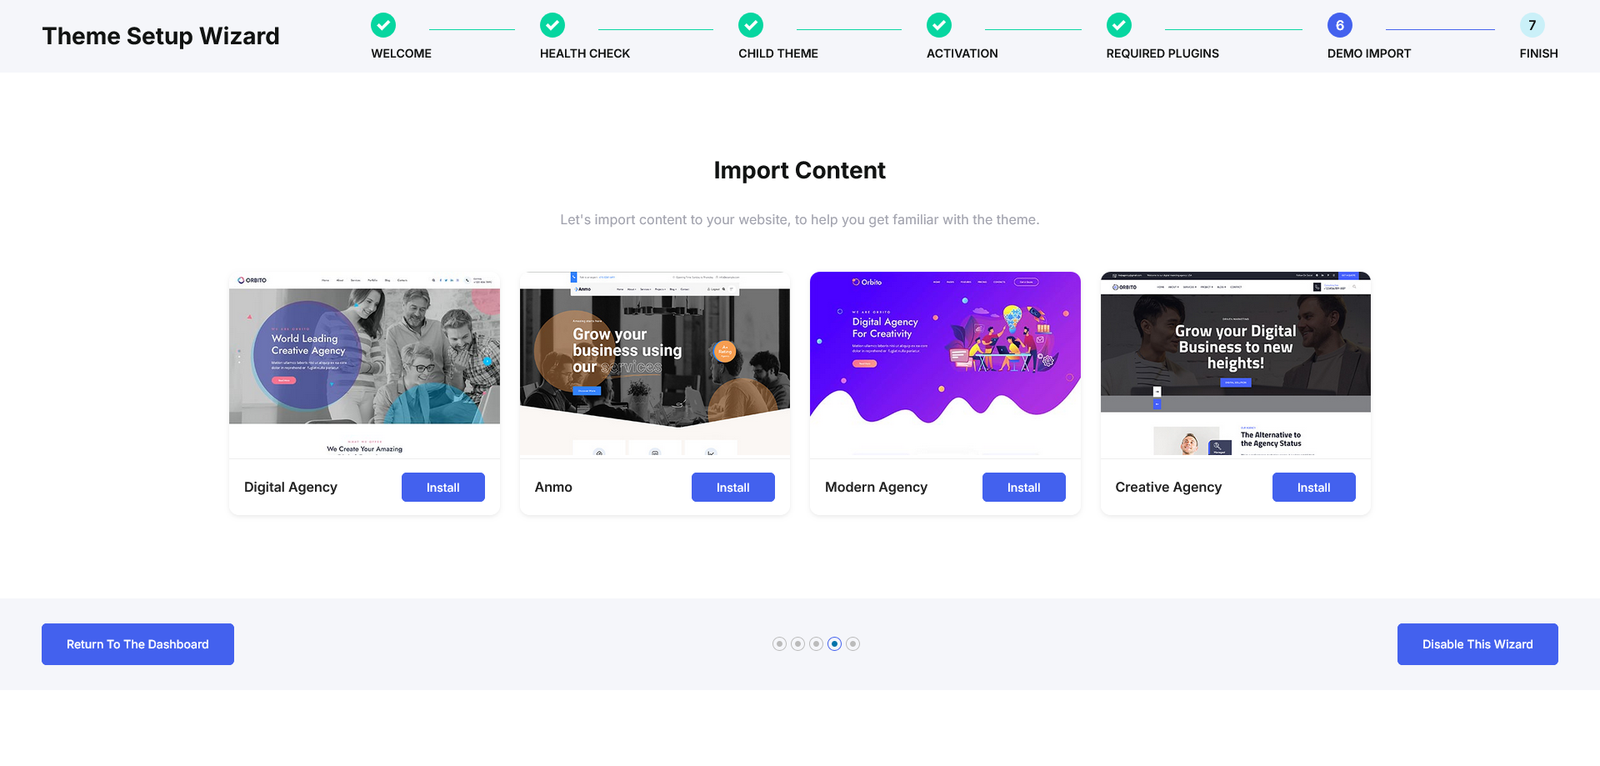
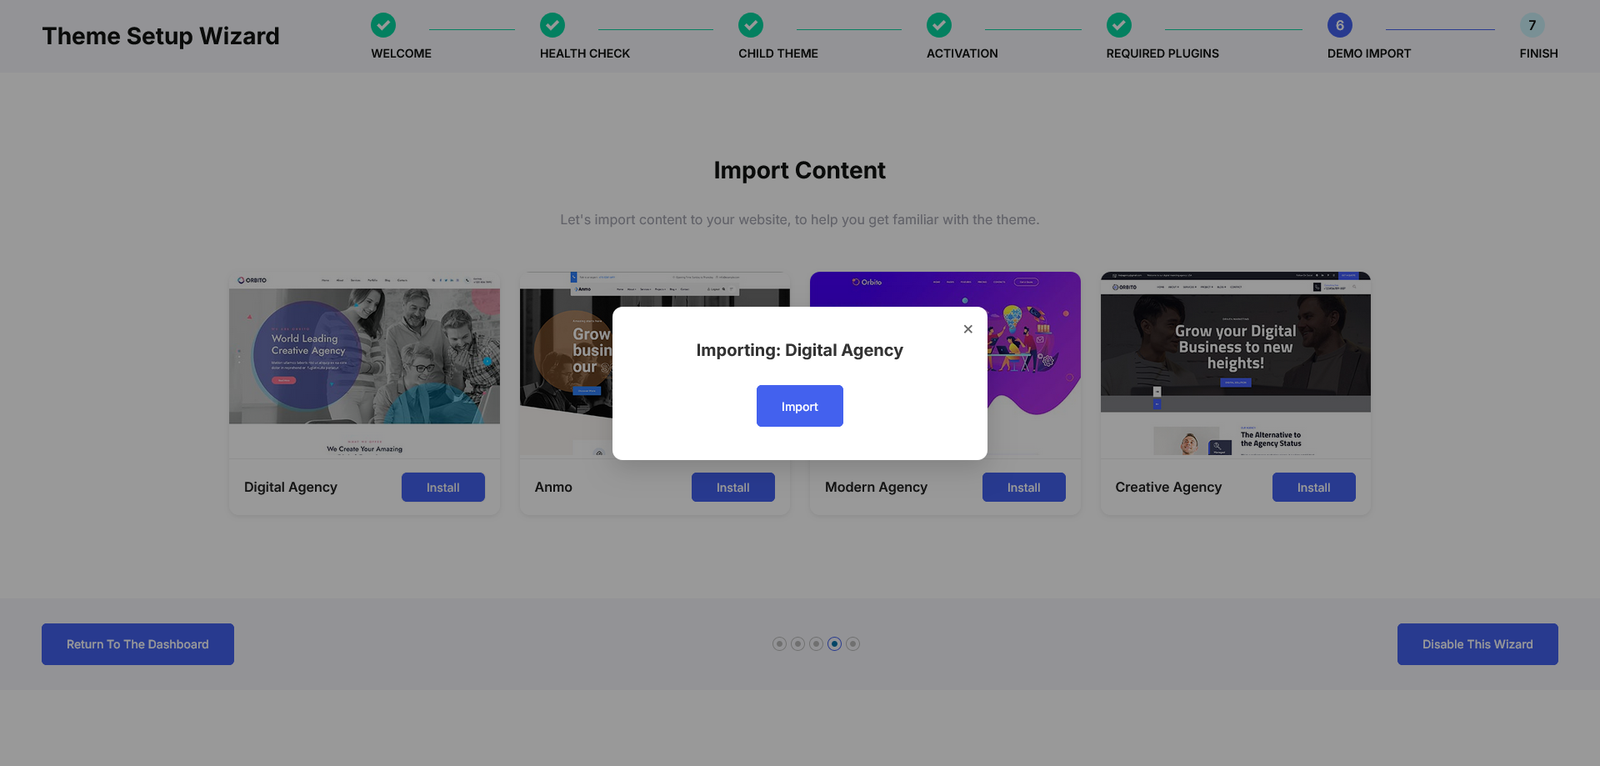
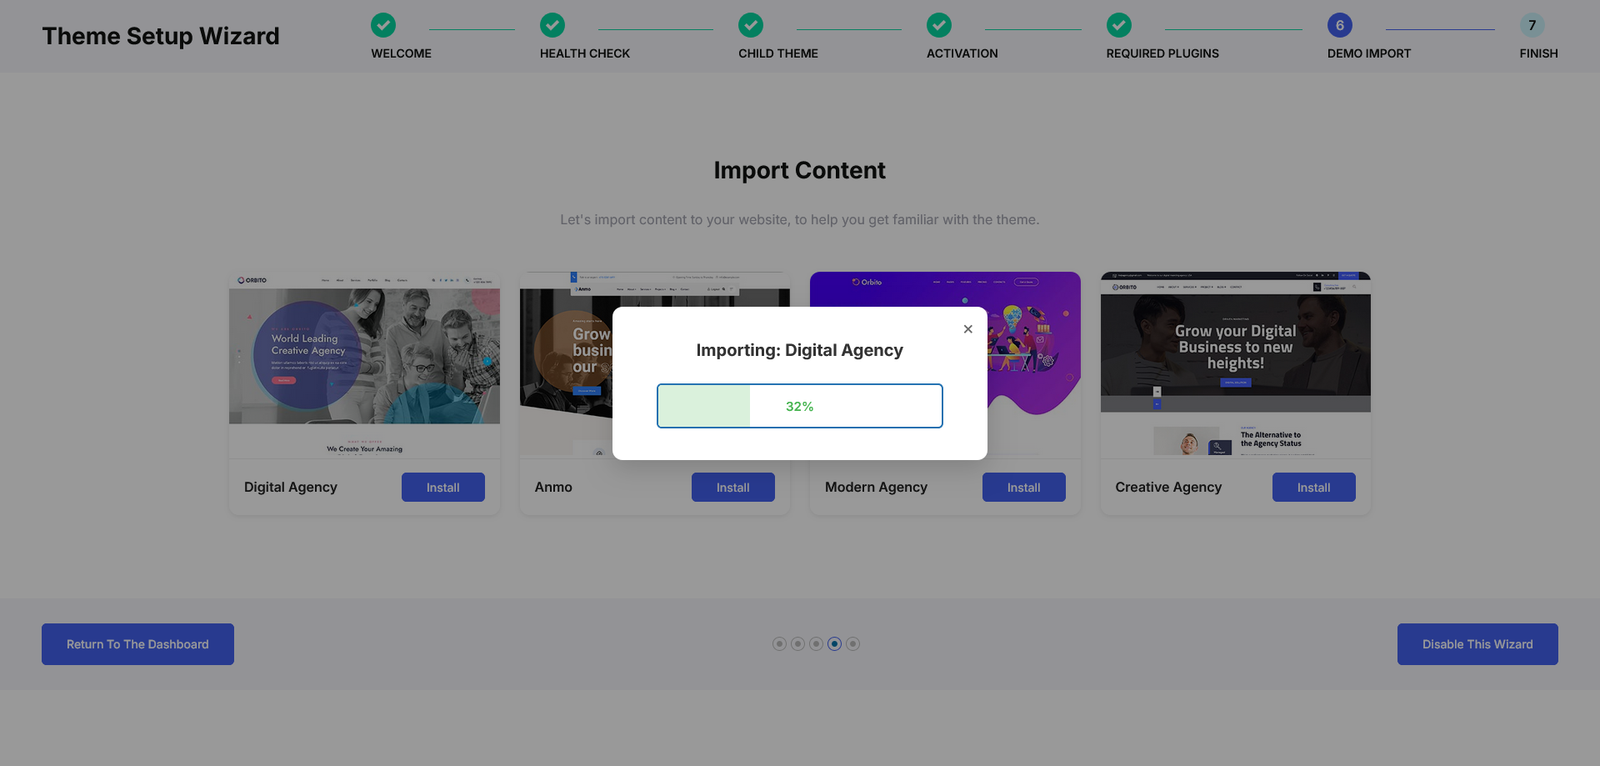
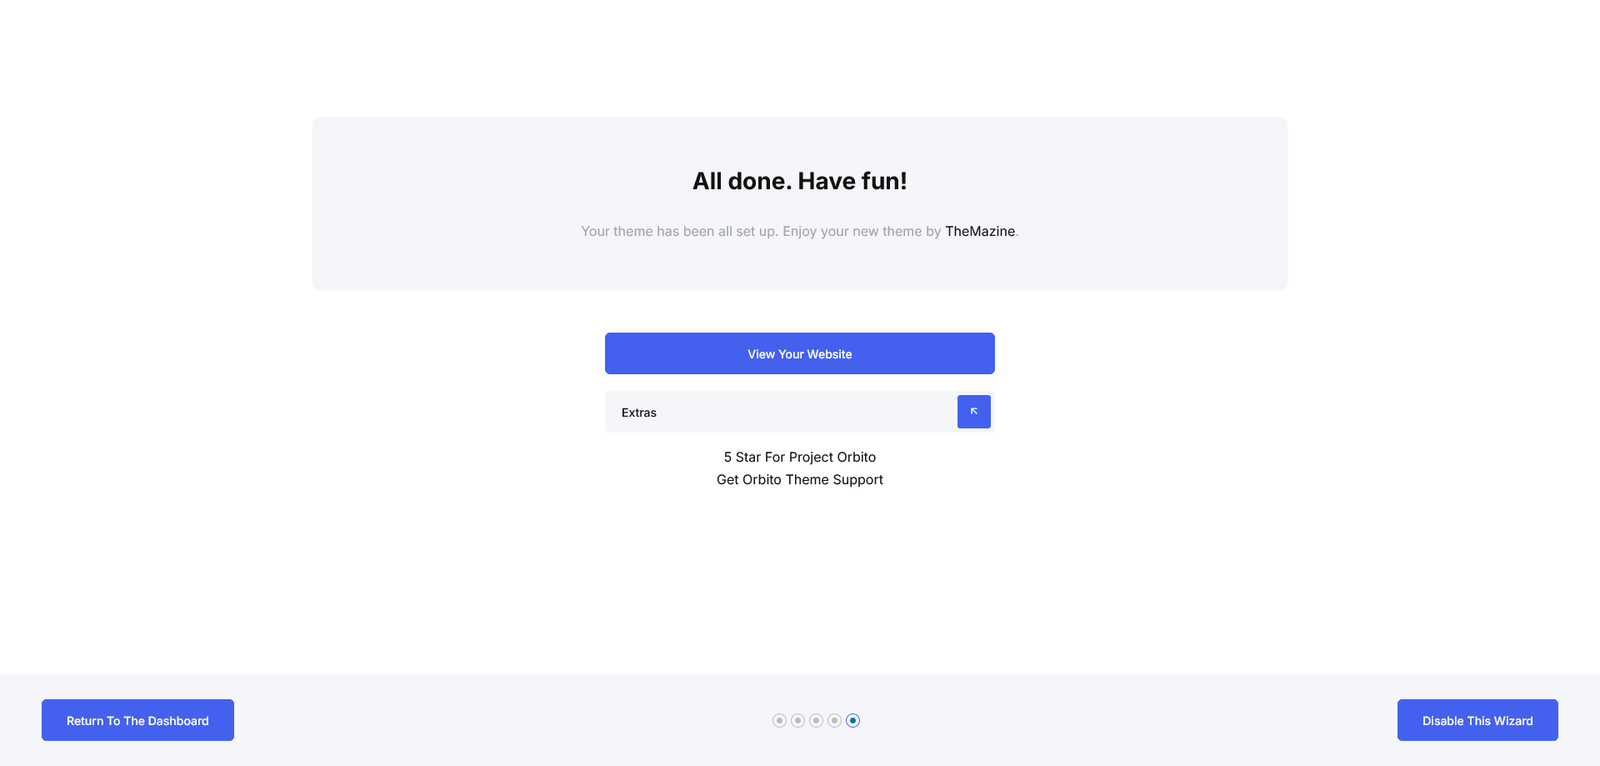
Dummy Content Import
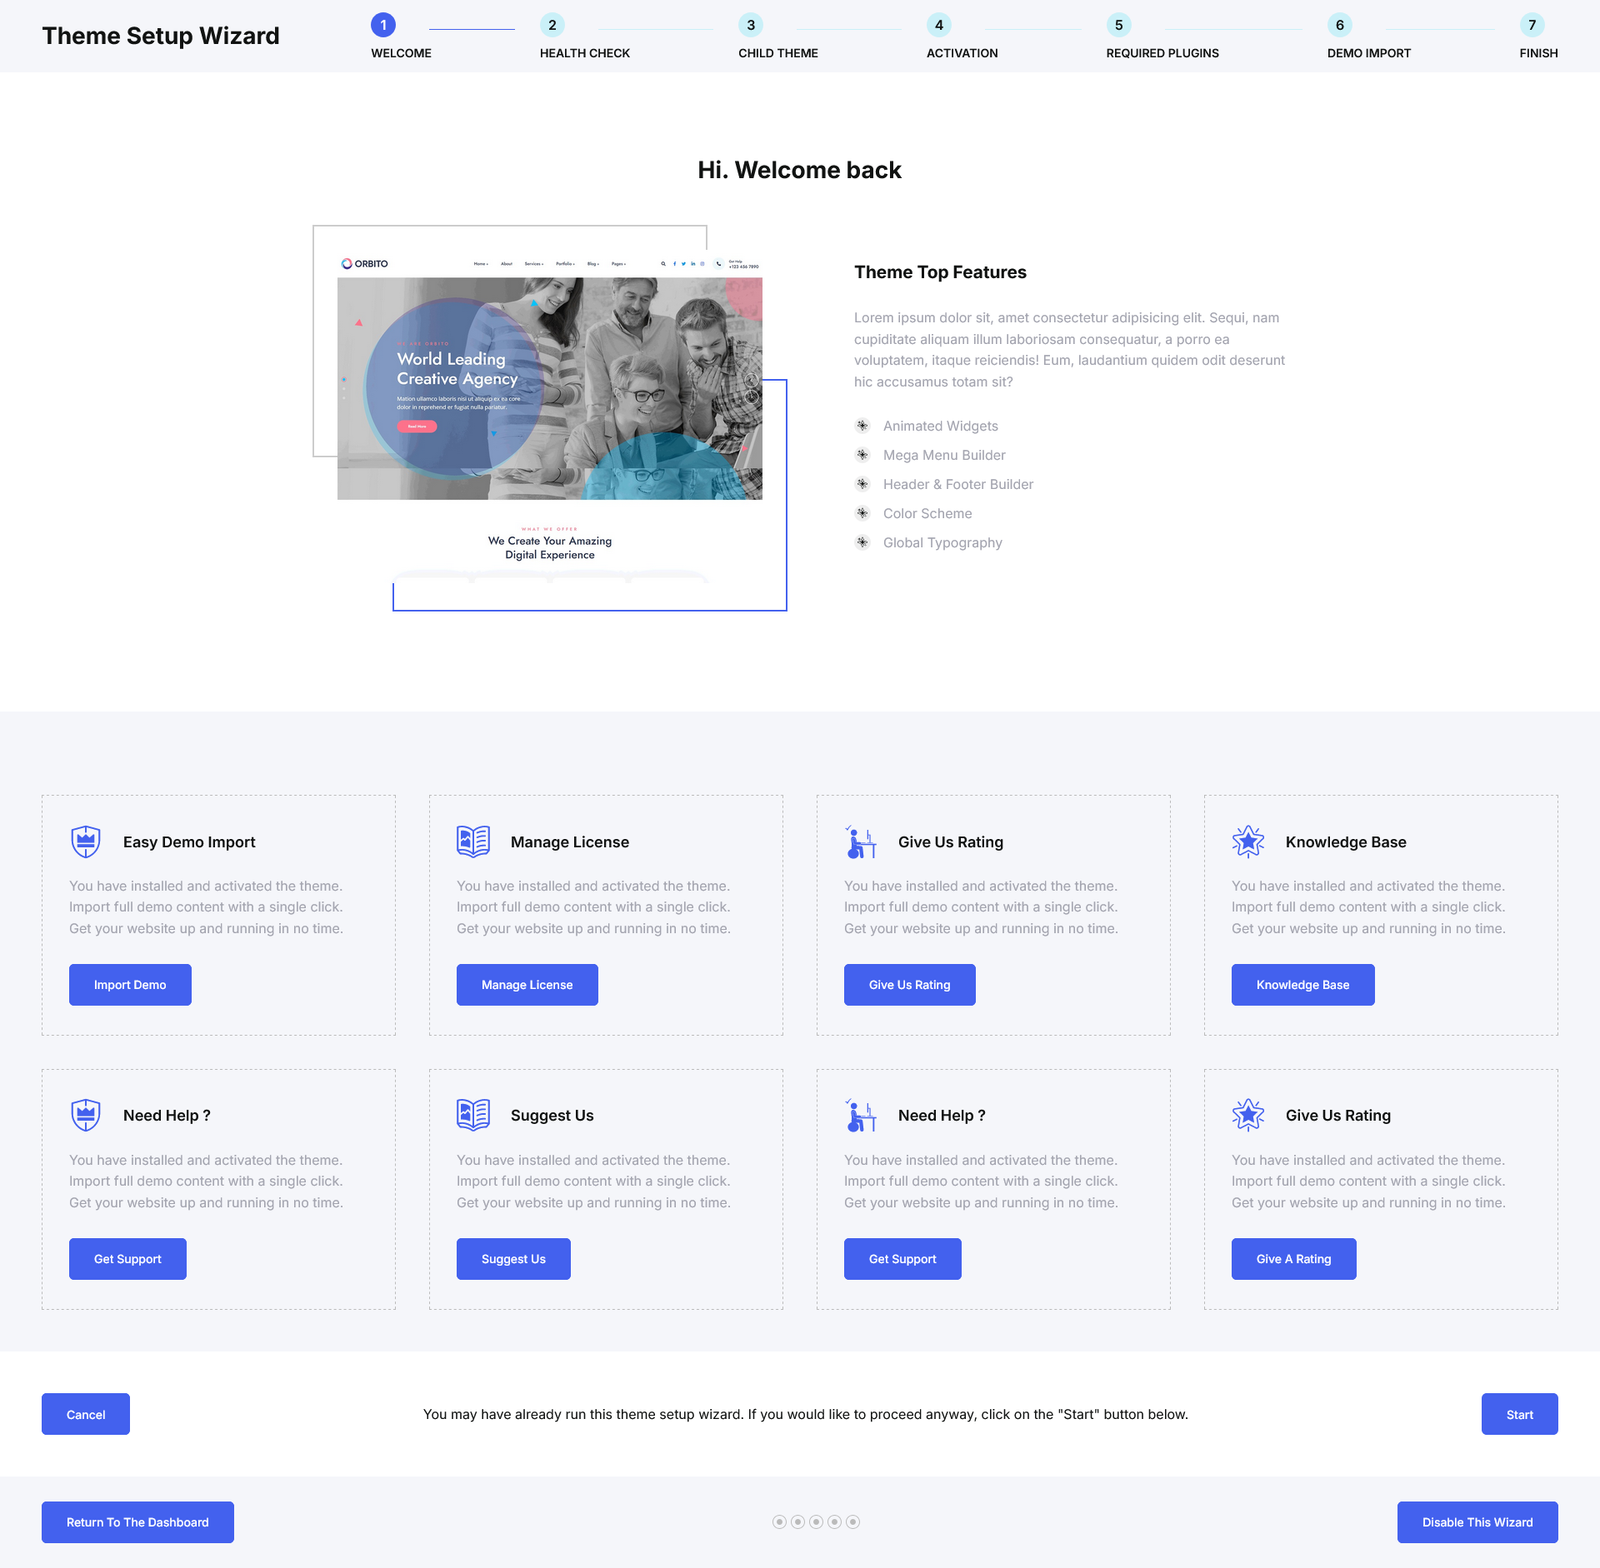
Once you have installed and activated both the theme and the required plugins, you can start building your perfect website.
Just like creating your own pages from scratch, you can also import any of the ready-made demos included with the Orbito theme with a single click. To do this, go to Appearance > Uiuxom Import in your WordPress dashboard. There, you will see a list of all available demos. Click the Import Demo button next to your desired demo to import it seamlessly into your site.
Video Tutorial
Elementor & Permalink Setting
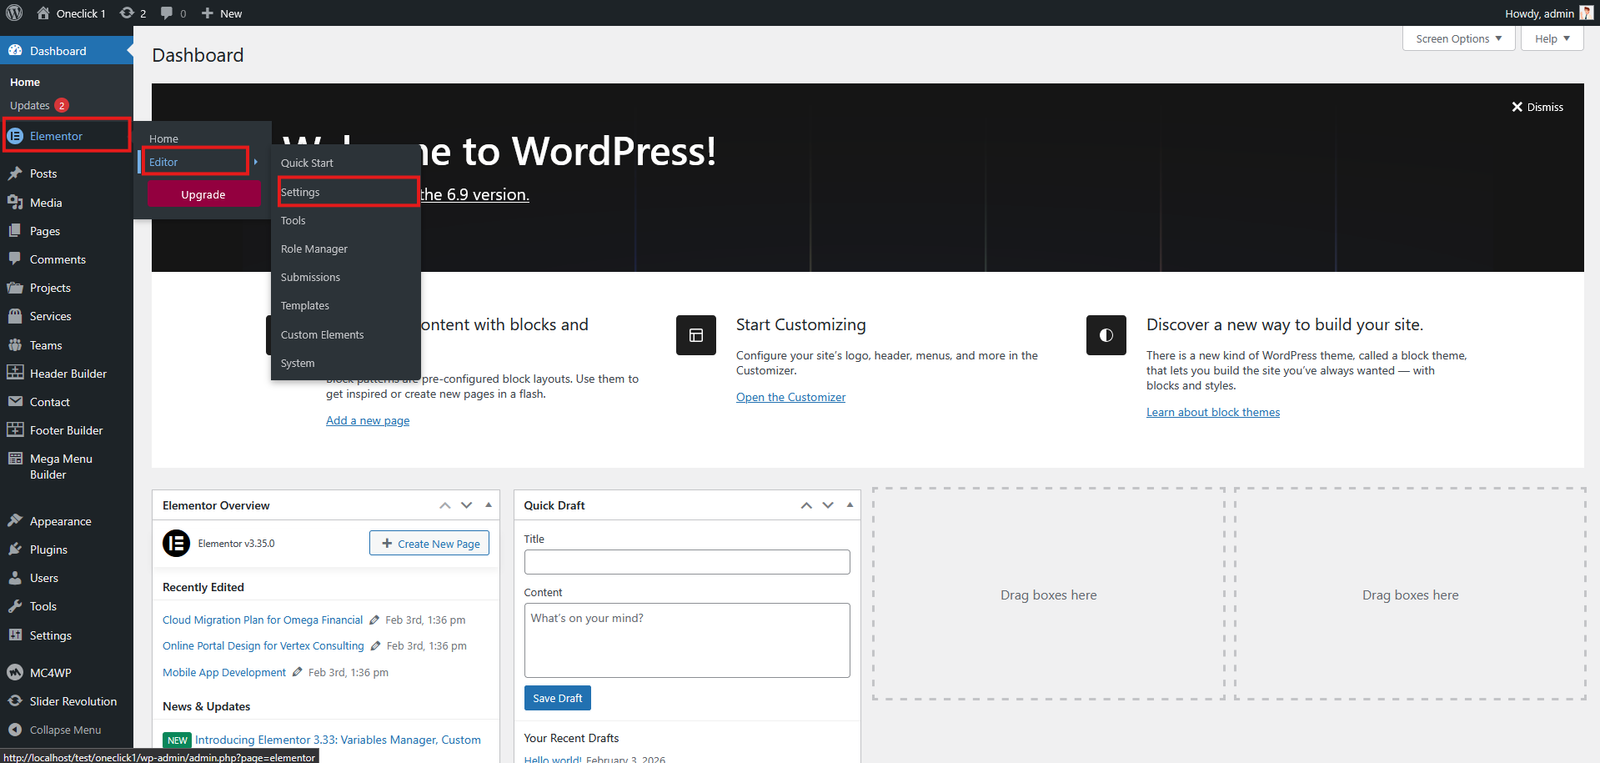
Elementor Setting
After OneClick Wizard complete please do the below settings.
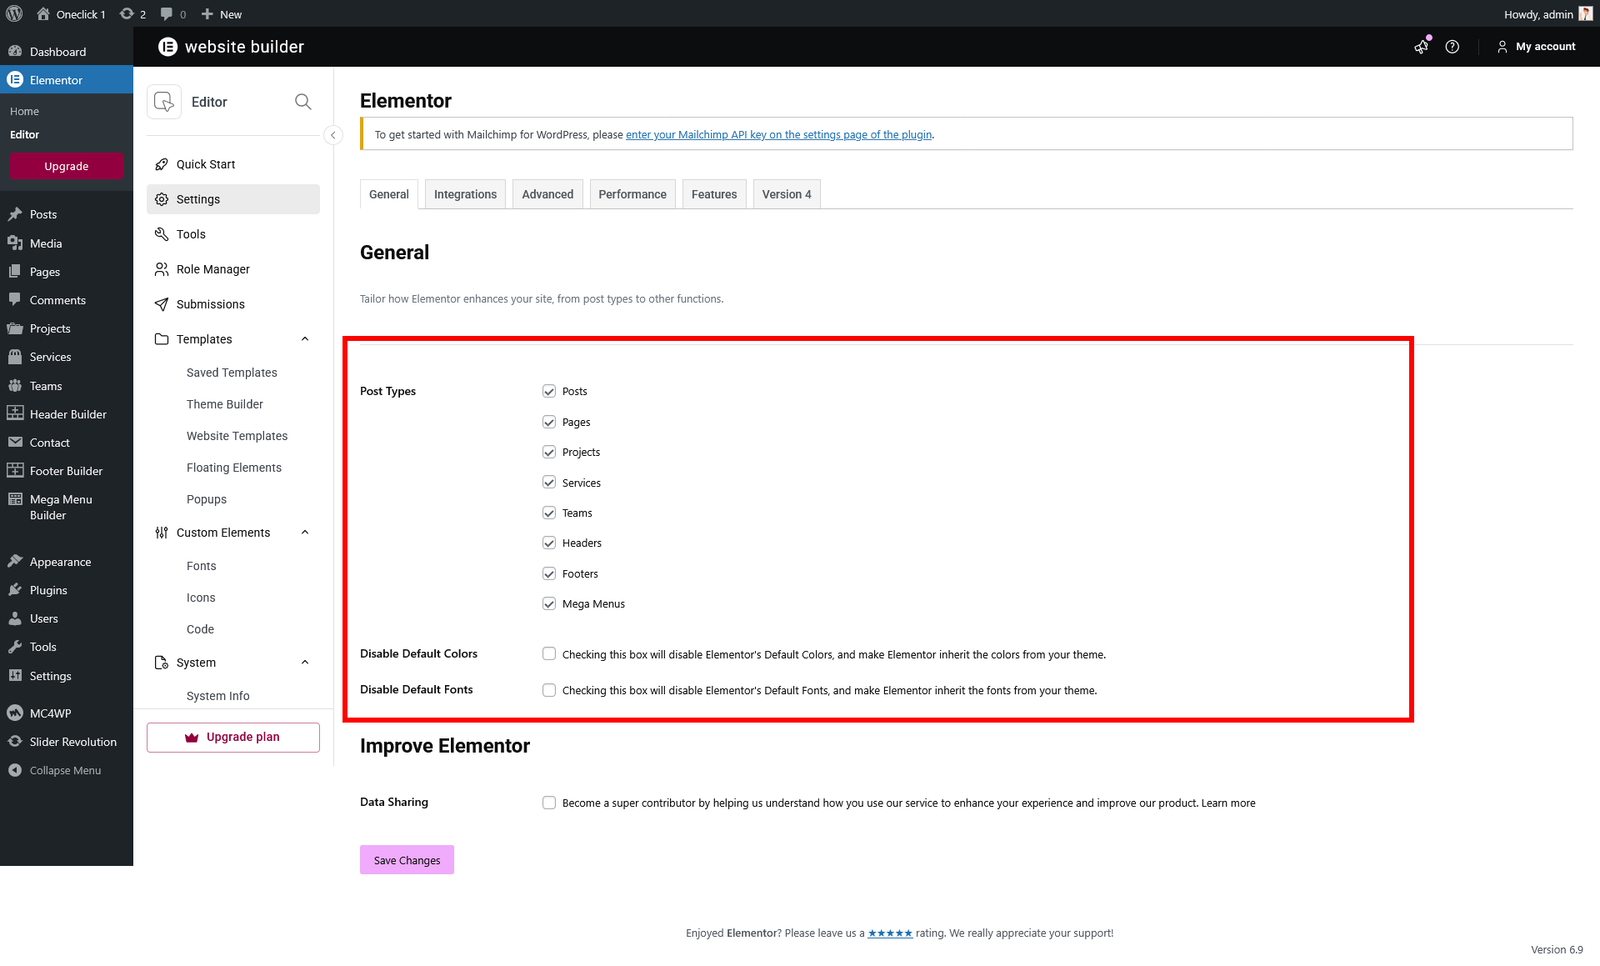
- Go to Elementor → Settings → General
- In General tab will find Post Types Setting
- Make sure to check all and save the settings
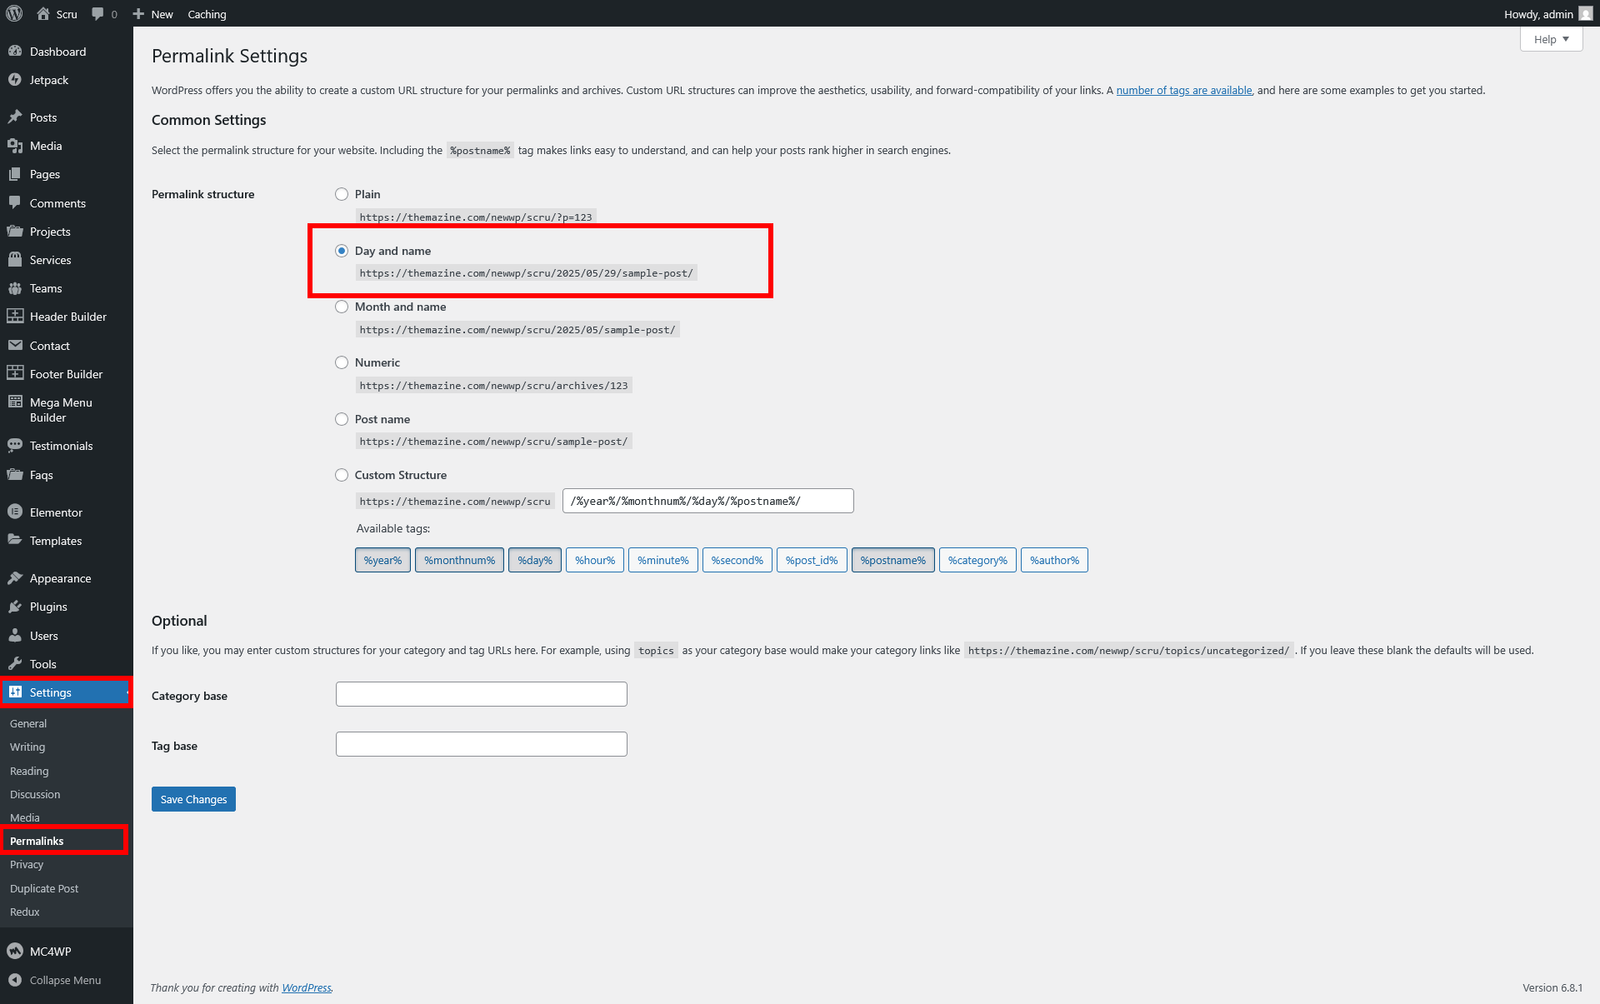
Permalink Setting
After OneClick Wizard complete please do the below settings.
- Go to Settings → Permalinks
- Here will get permalink structure Setting
- Make sure to check anyone of theme except of "Plan" option
Homepage & Blog — Setup
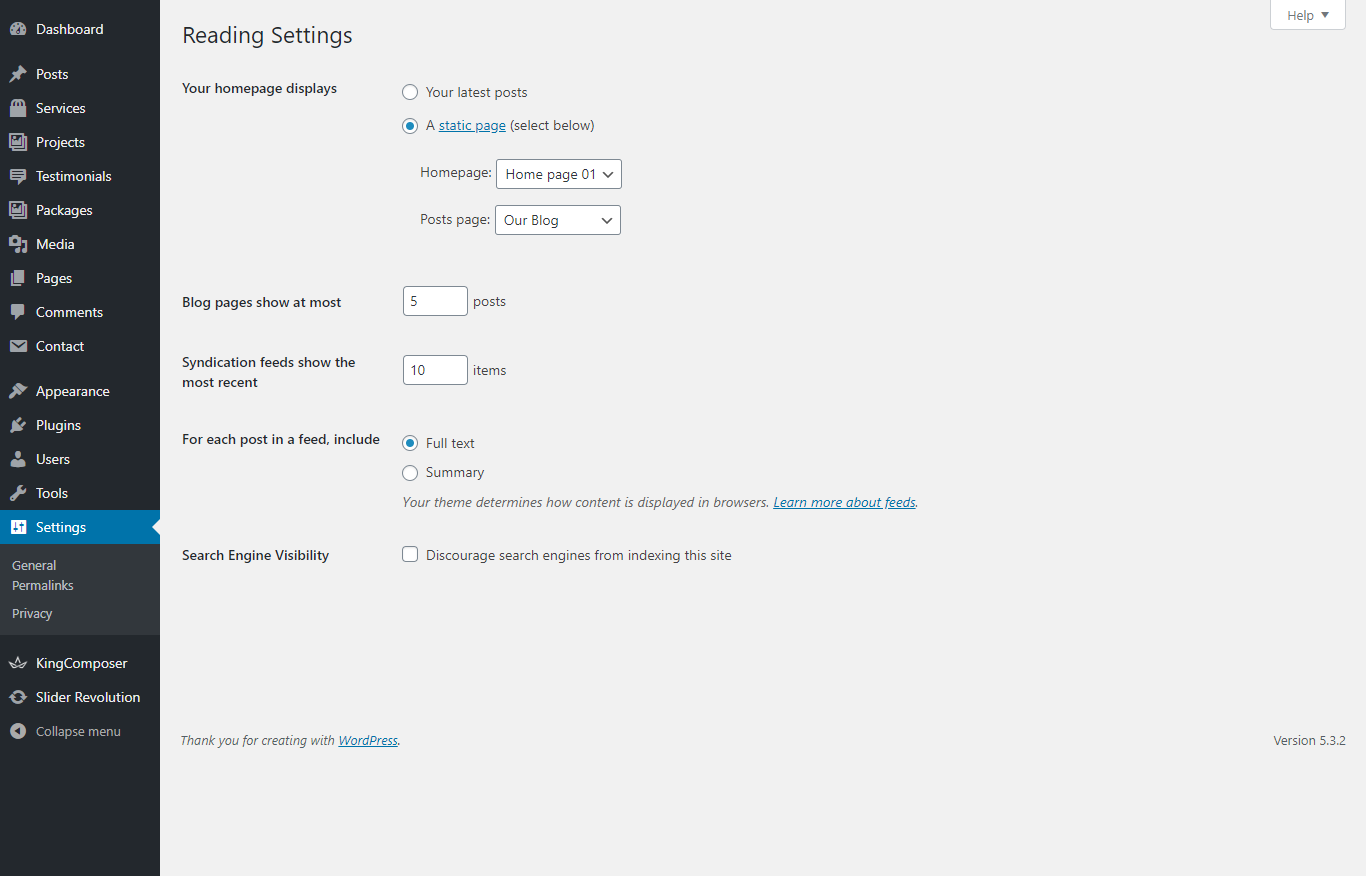
To setup the home page, in your WordPress admin panel, navigate to Settings → Reading.
Assuming you already have a page named "Front Page", for the Front page display, select "Home" and choose your "Homepage one" page as the home page. This is what you should be seeing on your screen from left side.
To setup the blog page, in your WordPress admin panel, navigate to Settings → Reading.
Assuming you already have a page named "Blog", for the Front page display, select "A static page" and choose your "Blog" page as the Posts page. This is what you should be seeing on your screen from left side.
Blog — Writing New Posts
To start adding posts to your blog, navigate to Posts → Add New.
- Start filling in the blanks: enter your post title, write your actual body content in the main post editing box below it.
- As needed, select a category, add tags, and make other selections from the sections below the post.
- When your post is ready, click Publish.
Deep Diving: Since creating and editing pages requires basic WordPress knowledge, we won't cover it in detail. If you're new to WordPress, you may find the following resources valuable: How to Create a new Post How to Edit and Existing Post Using Categories and Tags
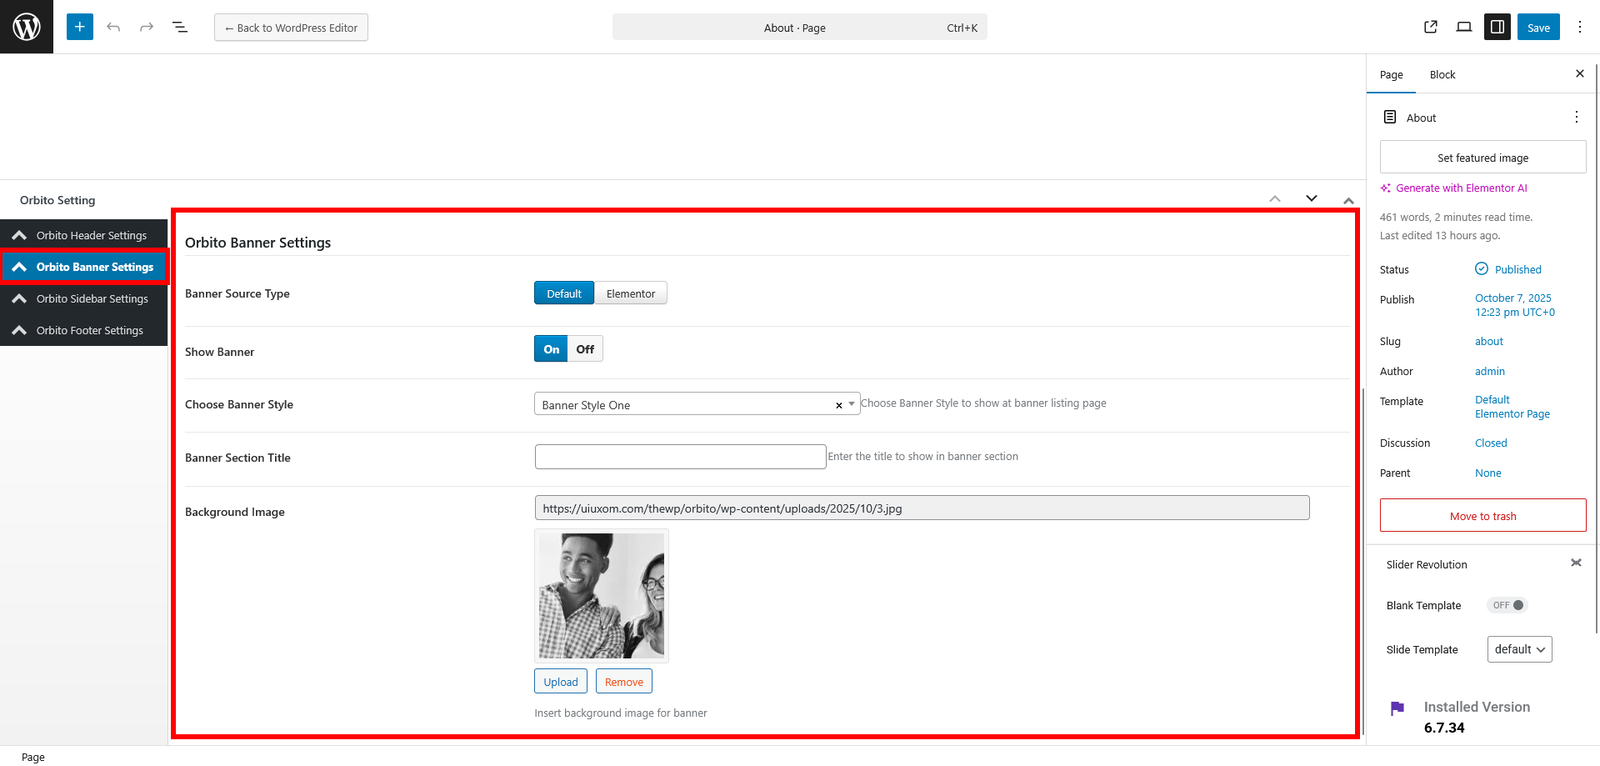
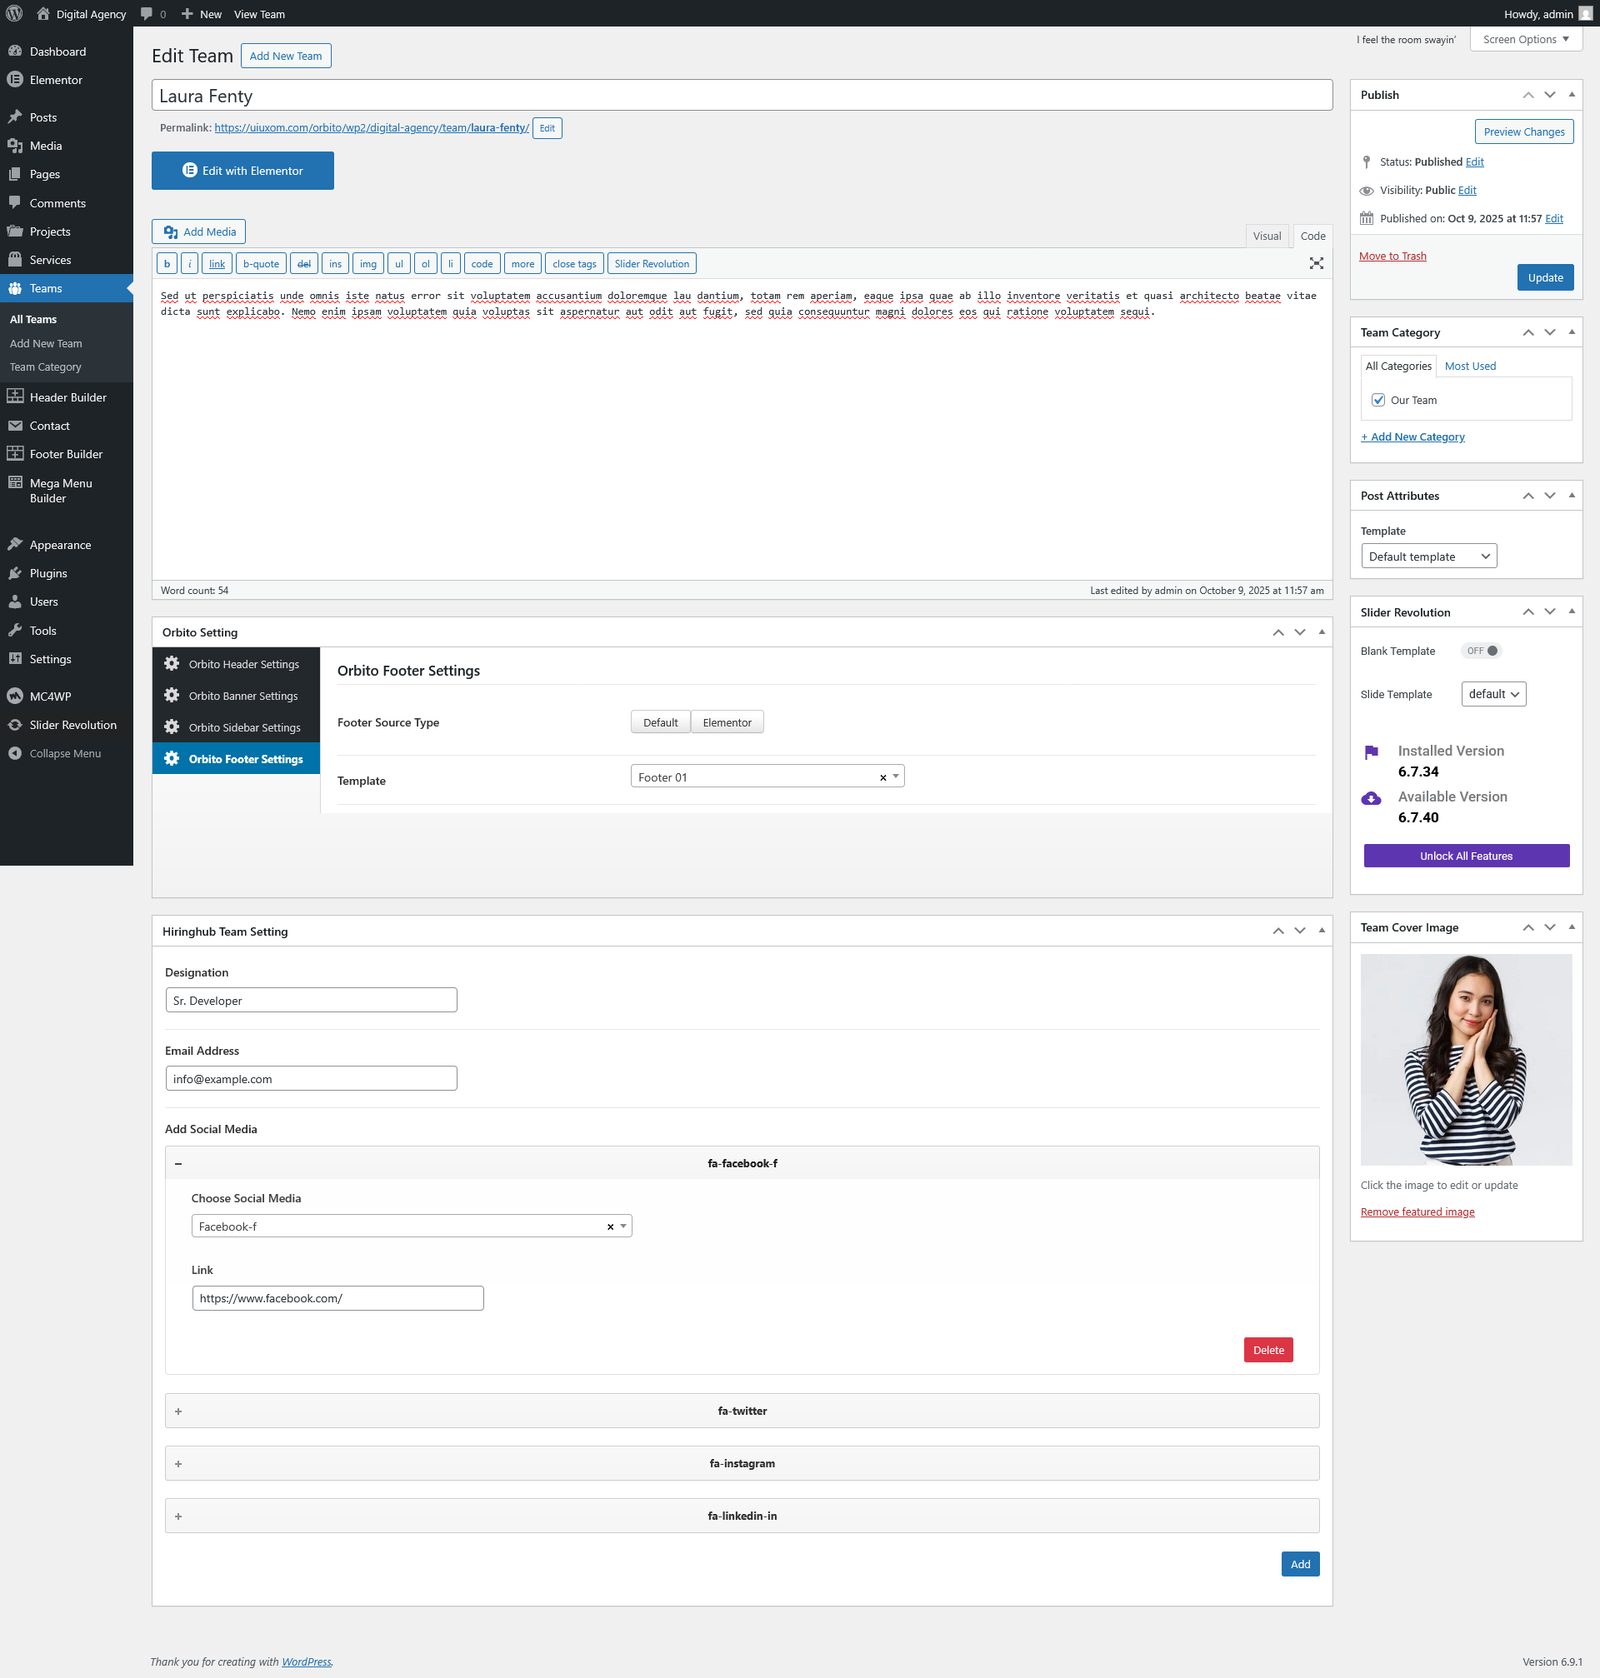
Page Banner — Setup
- From the Dashboard, navigate to Pages → Add New.
- Create a new page and give it a name like "About".
- Set the page template to "Default Elementor Page" in the Page Attributes section.
- On the page edit screen, you'll see an option "Orbito Settings" here you will find the option for page banner.
- In the page banner setting you can set the banner image and title.
- From the Dashboard, navigate to Post → Add New.
- On the post edit screen, you'll see an option "Orbito Settings" here you will find the option for page banner.
- In the page banner setting you can set the banner image and title.
Video Tutorial
Header Builder Setting
For the header builder setting please follow the below settings.
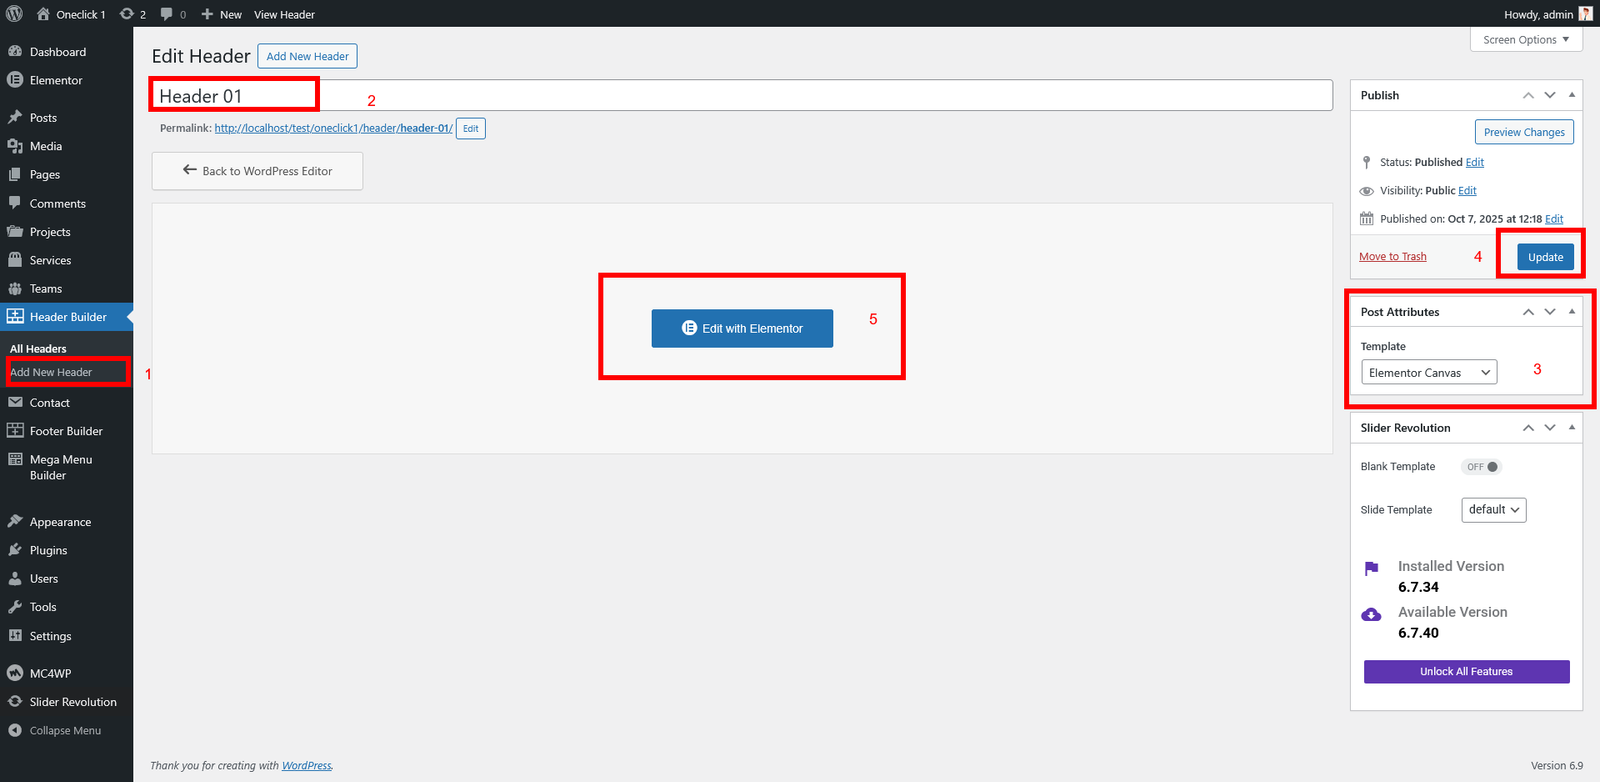
- Go to Header Builder CPT ( Custom Post Type )
- Create New Header
- Name The Header
- Set the post attribute template to "Elementor Canvas". its cumplosry to set the page attribute to just Elementor Canvas Template otherwise it will not work properly.
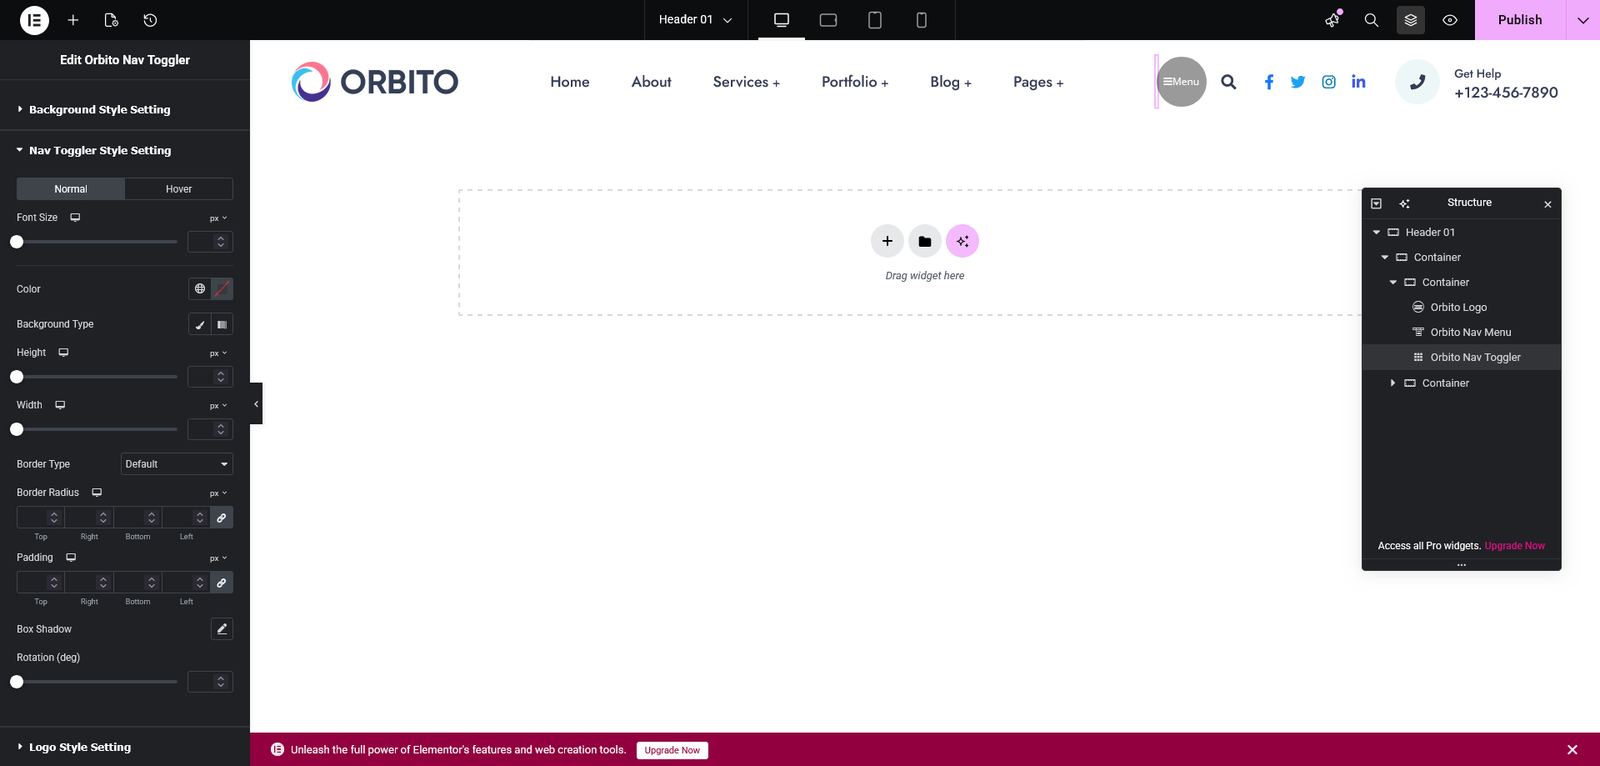
- Publish the header and start editing with elementor builder
Header Template Deploy Setting.
There is two way to set the header templates
- Theme Options which will work as global header
- Page Setting here you have option to set differents header for pages.
Theme Options Settings
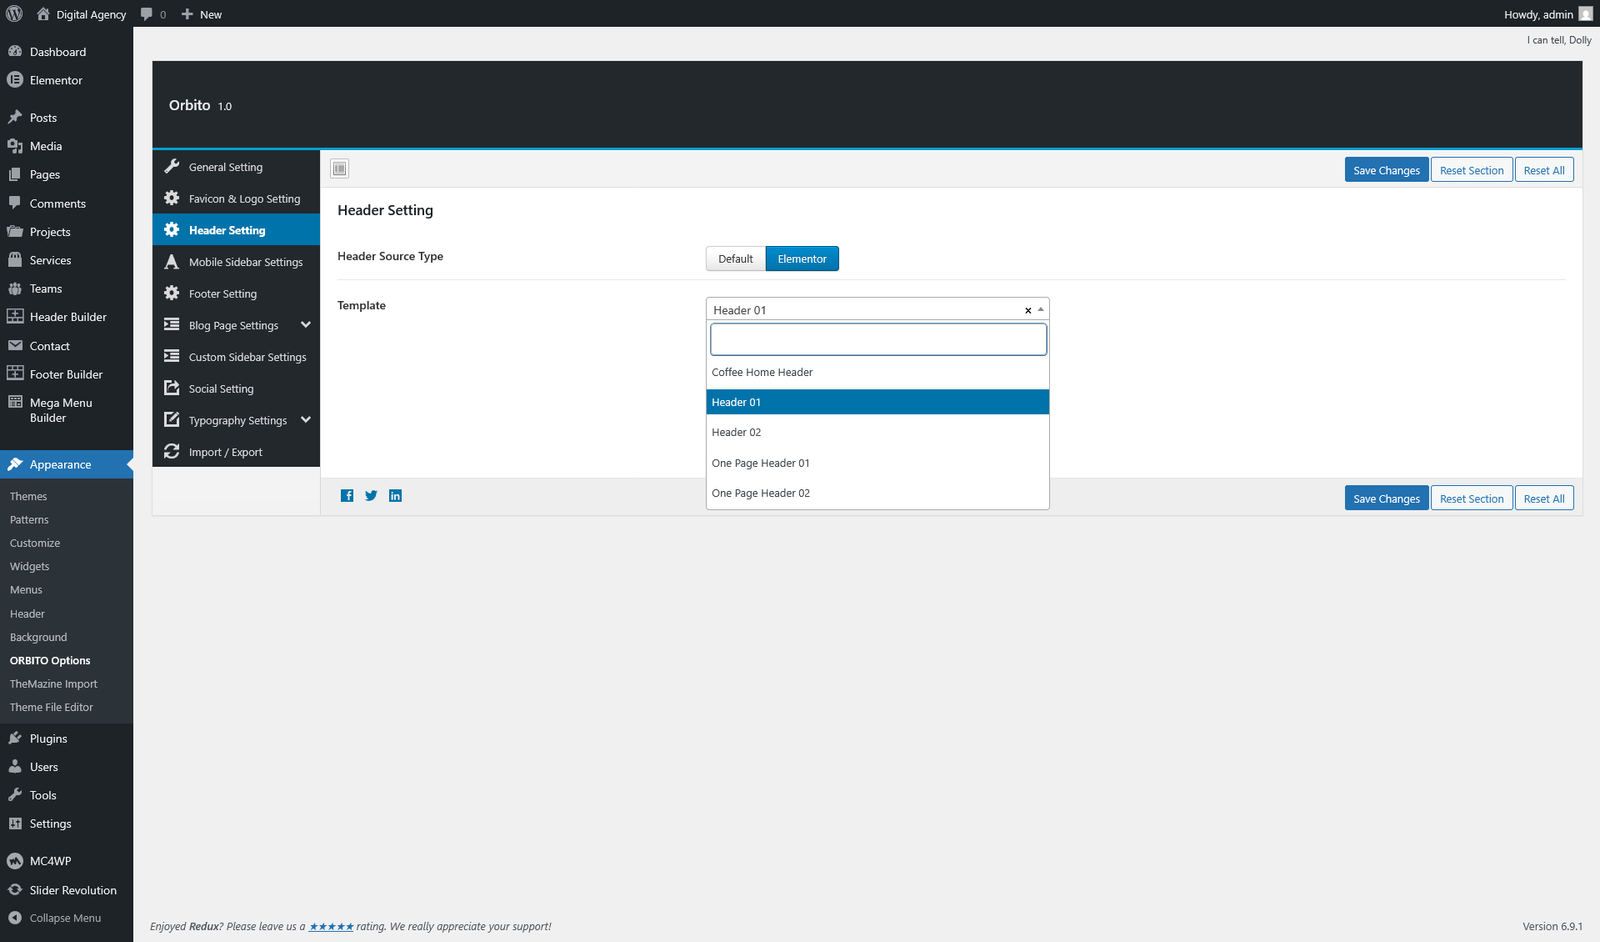
- Go to Appearance → Orbito Options → Header Settings
- From the header source click on elementor tab
- here you will find the created header templates.
Dynamic Pages Settings
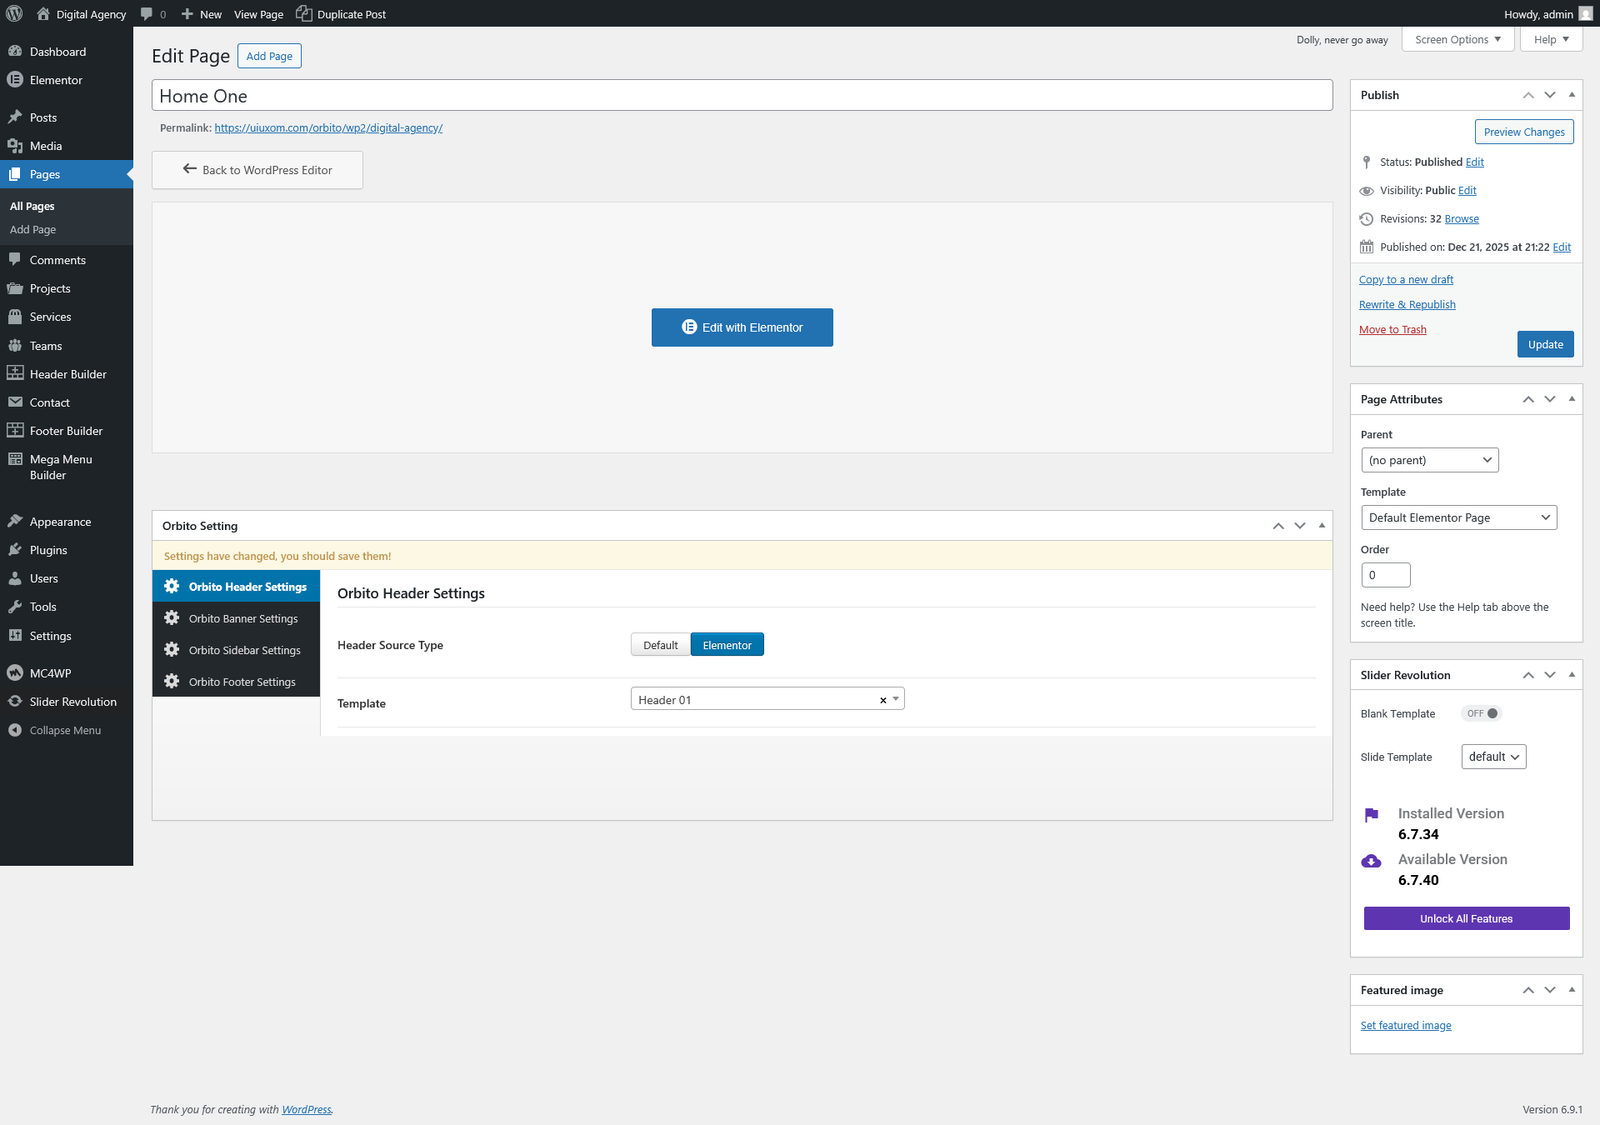
- Go to Pages → Edit Page
- Scroll Down here you will find the header setting
- From the header source click on elementor tab
- here you will find the created header templates.
Video Tutorial
Mega Menu Builder Setting
For the mega menu builder setting please follow the below settings.
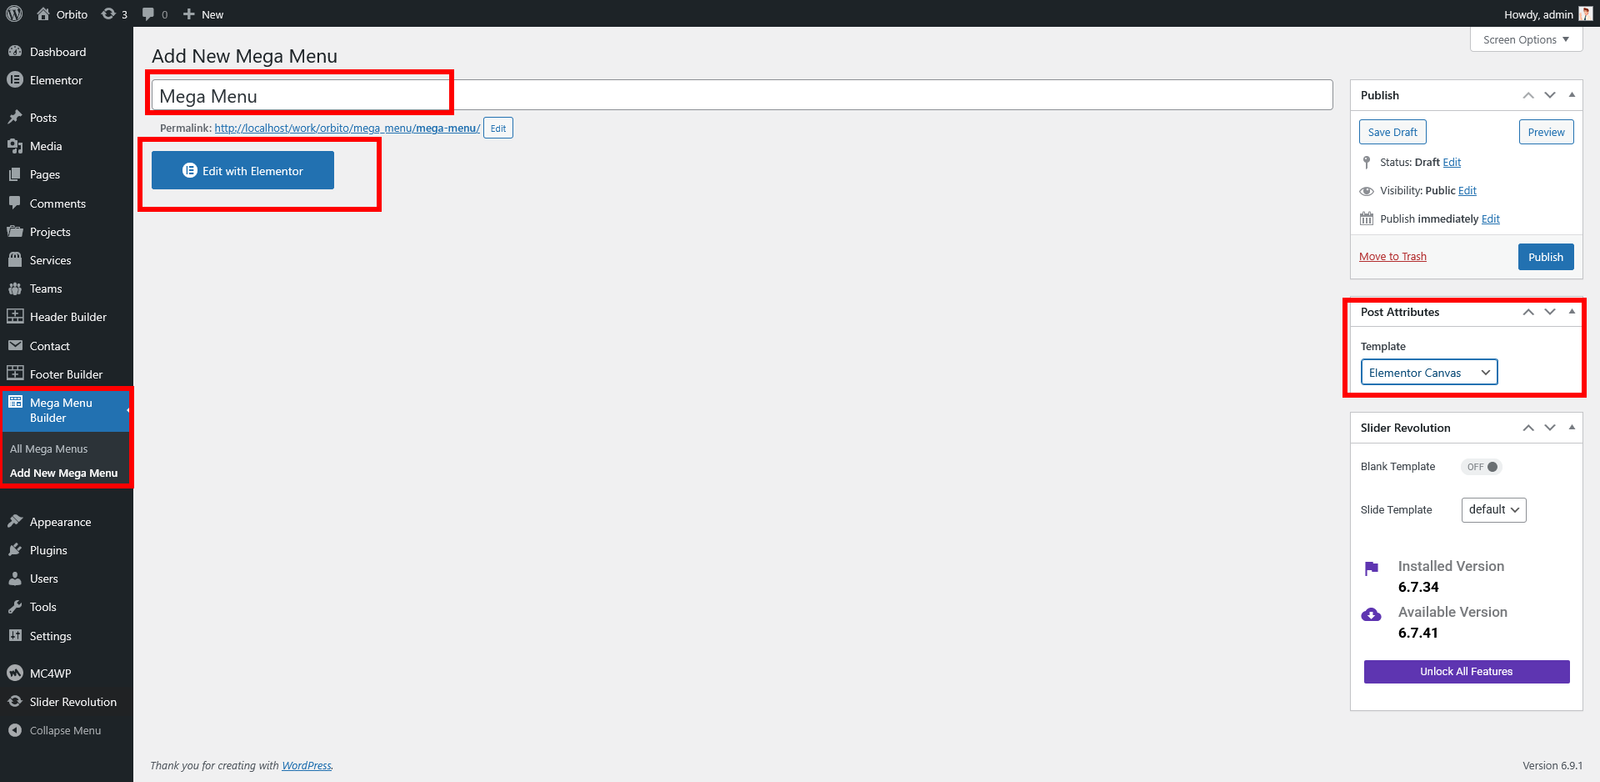
- Go to Mega Menu Builder CPT ( Custom Post Type )
- Create New Mega Menu
- Name The Mega Menu
- Set the post attribute template to "Elementor Canvas". its cumplosry to set the page attribute to just Elementor Canvas Template otherwise it will not work properly.
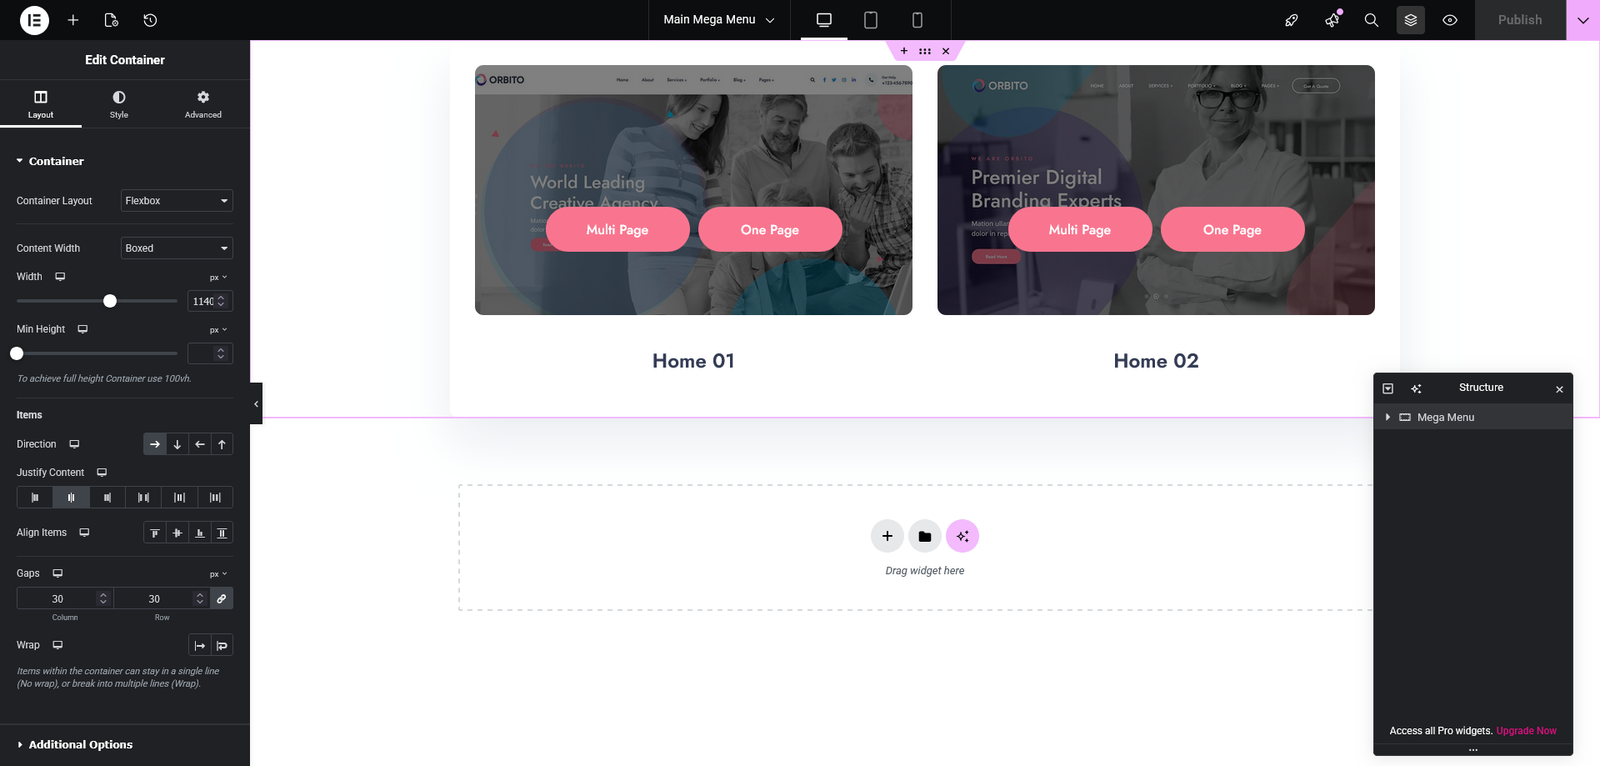
- Publish the mega menu and start editing with elementor builder
Mega Menu Template Deploy Setting.
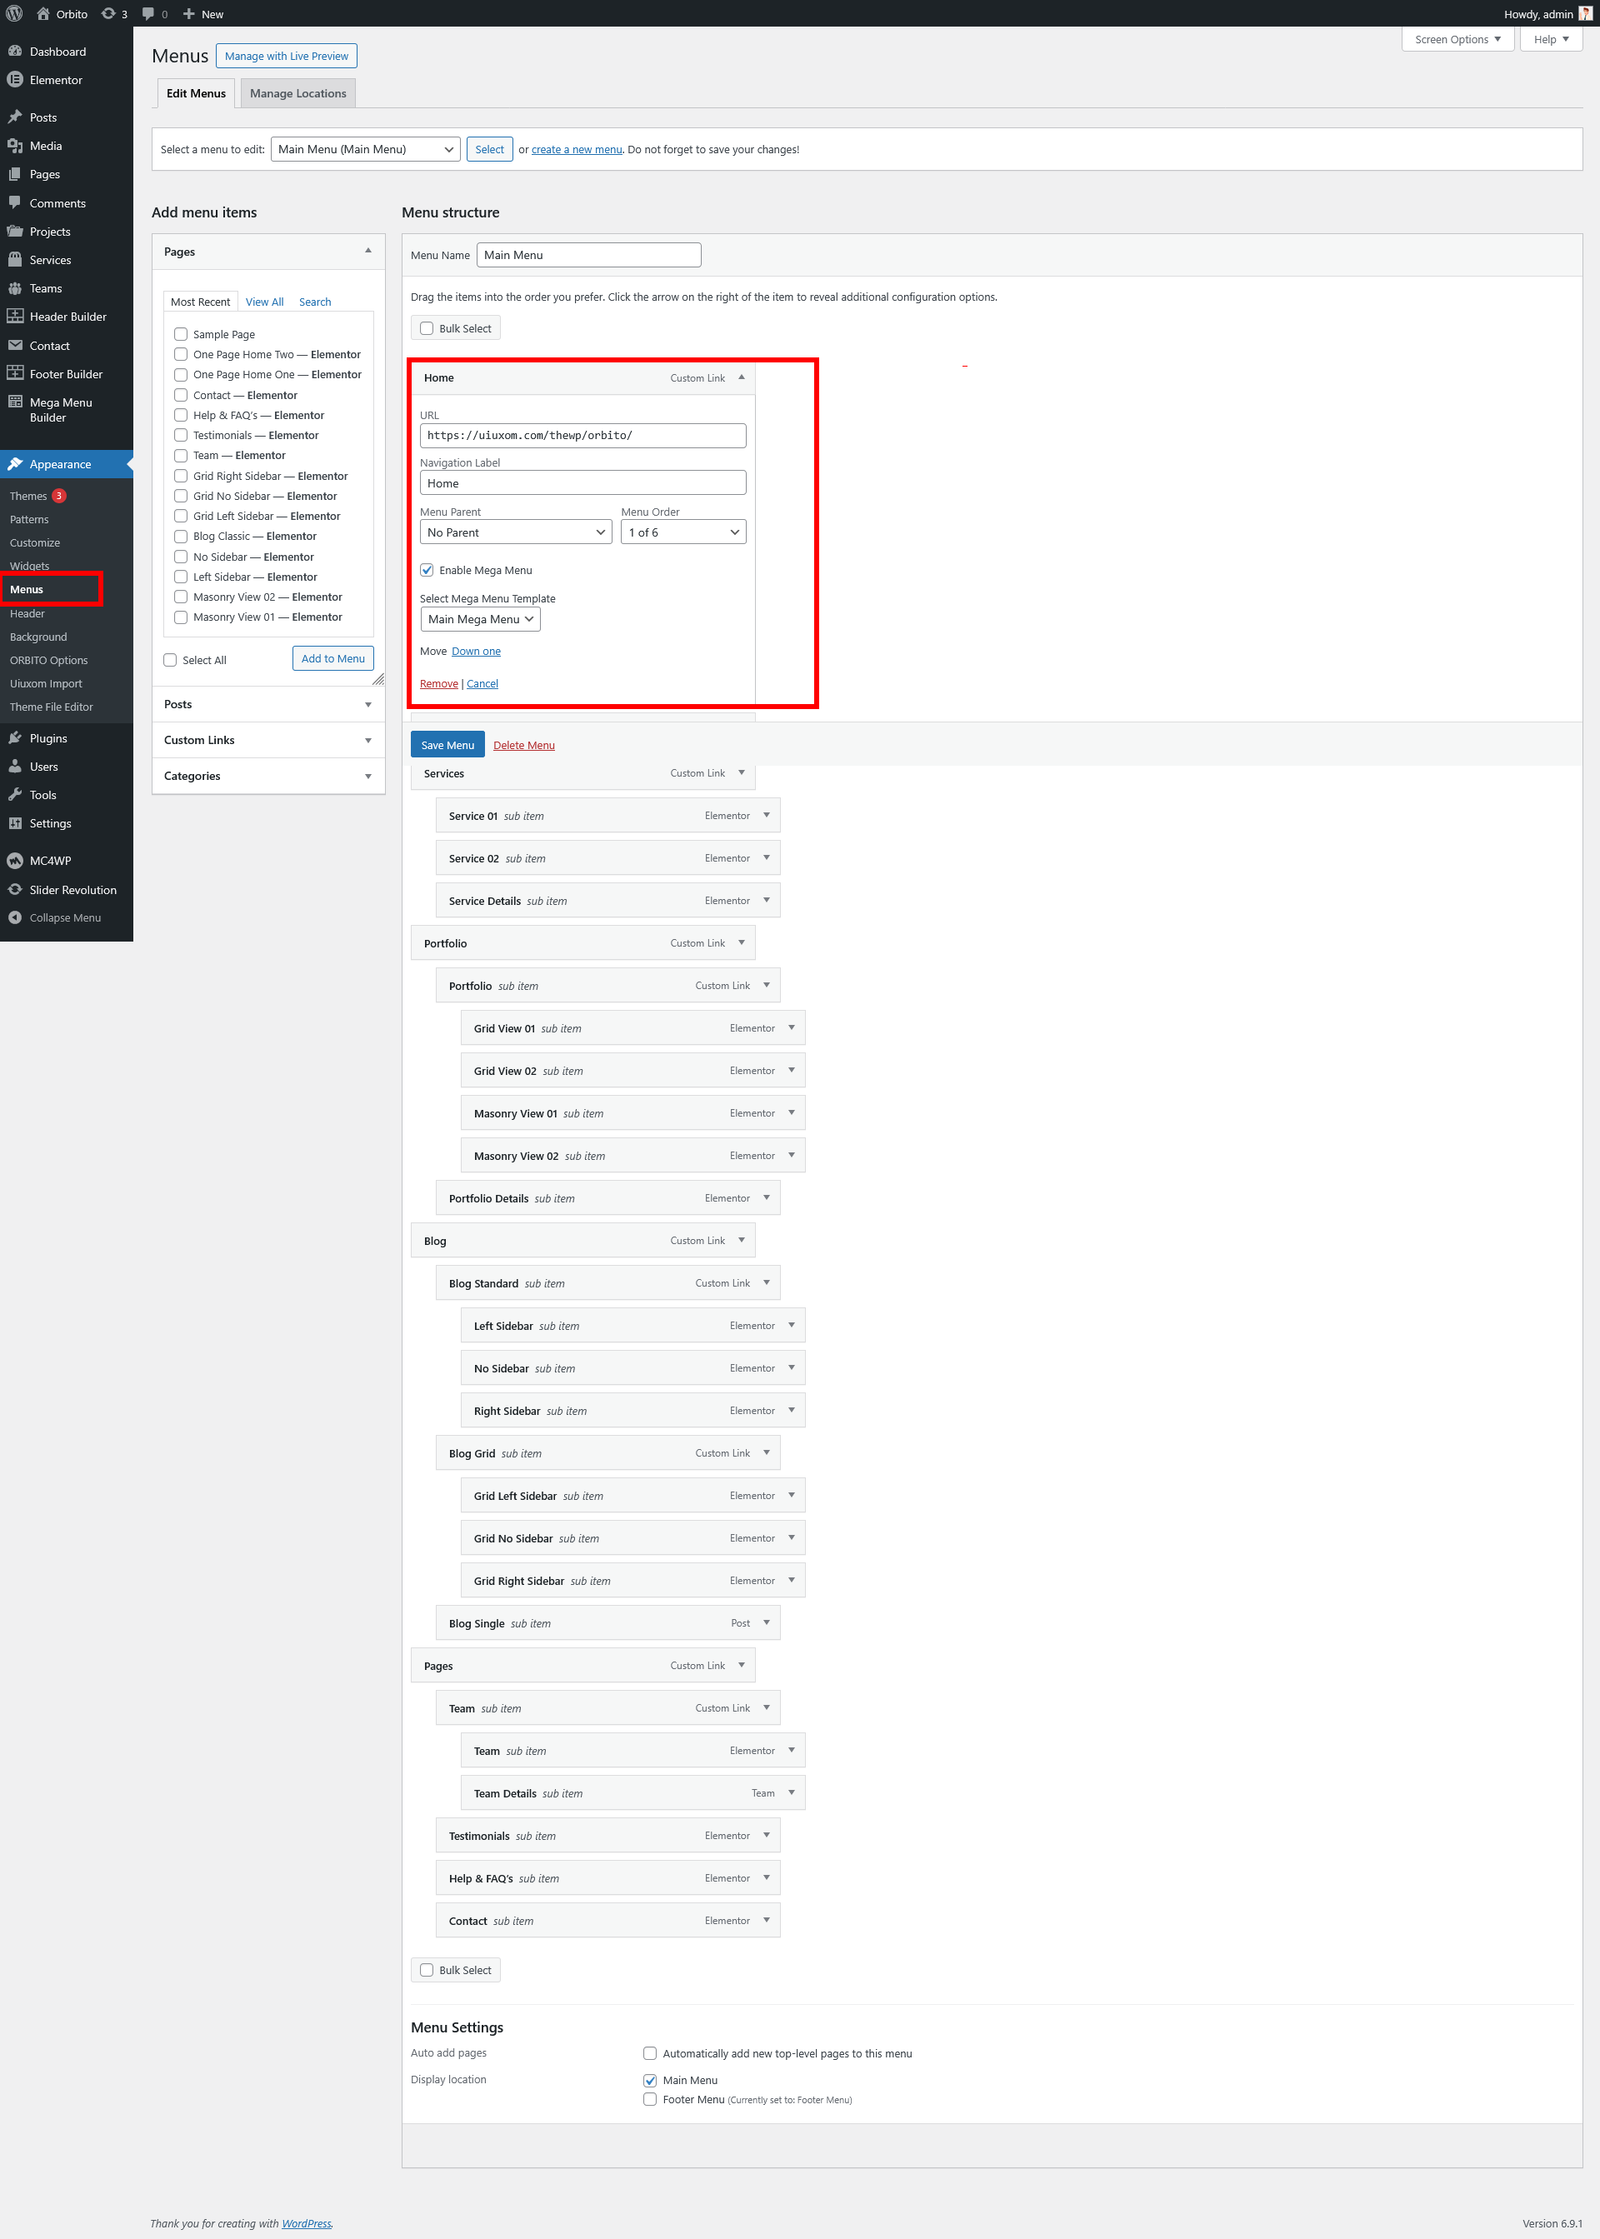
- From the dashboard go to Appearance → Menu
- Create a Menu
- Add a Menu Item
- Open Menu Item in the bottom there is a option to set the mega menu template and on/off switch button.
Video Tutorial
Footer Builder Setting
For the footer builder setting please follow the below settings.
- Go to Footer Builder CPT ( Custom Post Type )
- Create New Footer
- Name The Footer
- Set the post attribute template to "Elementor Canvas". its cumplosry to set the page attribute to just Elementor Canvas Template otherwise it will not work properly.
- Publish the footer and start editing with elementor builder

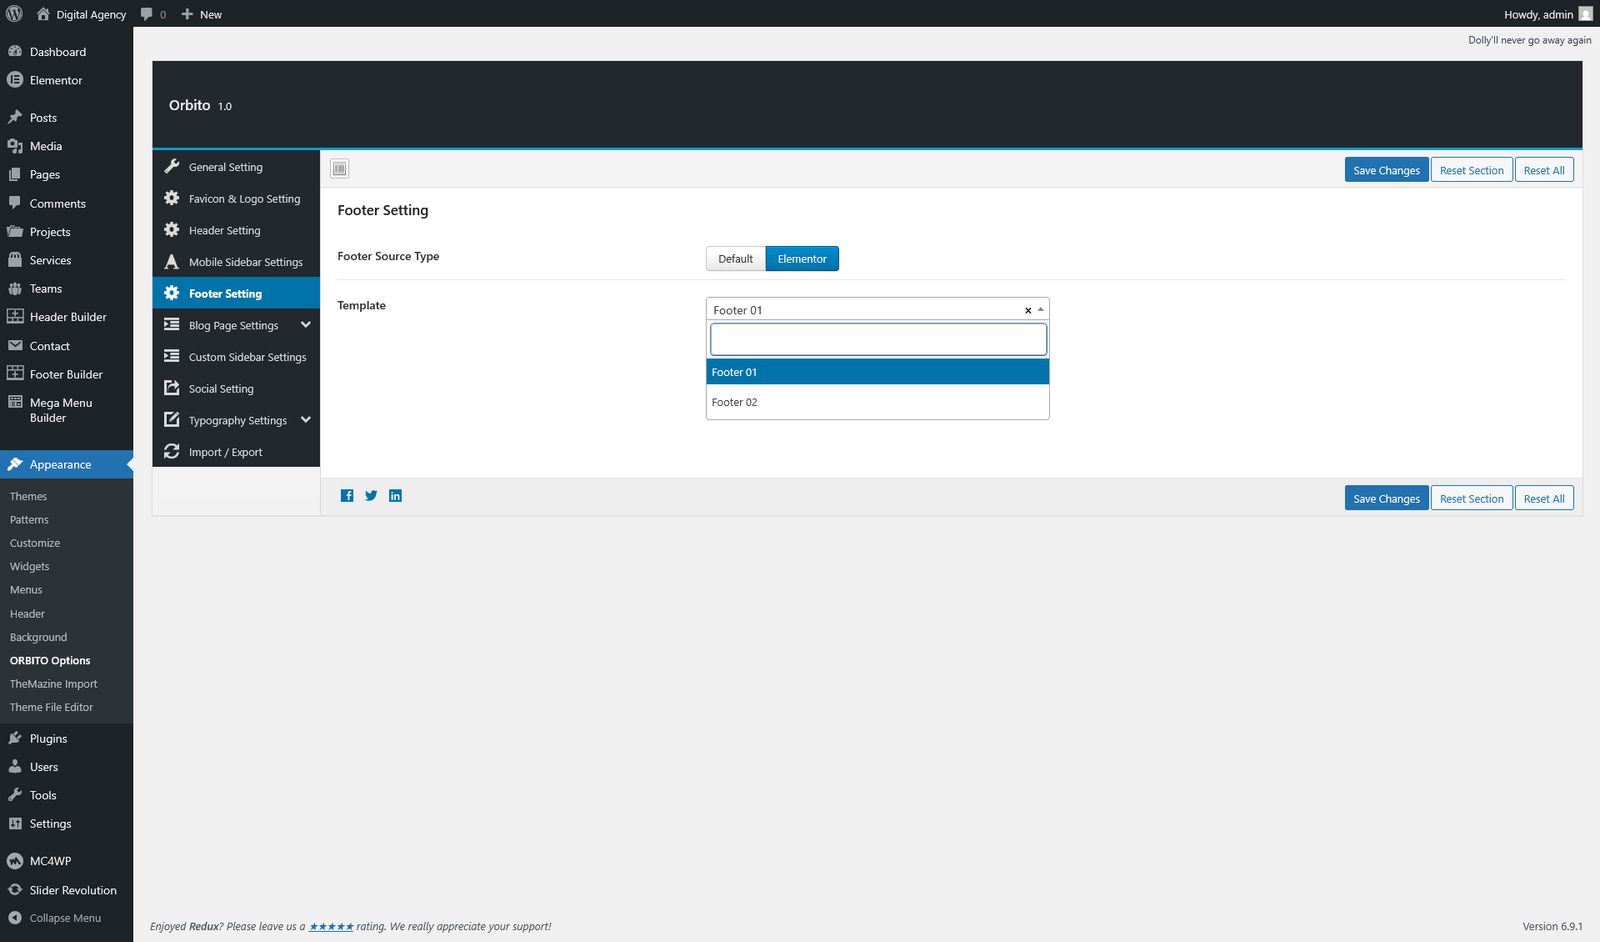
Footer Template Deploy Setting.
There is two way to set the footer templates
- Theme Options which will work as global header
- Page Setting here you have option to set differents footer for pages.
Theme Options Settings
- Go to Appearance → Orbito Options → Footer Settings
- From the footer source click on elementor tab
- here you will find the created footer templates.
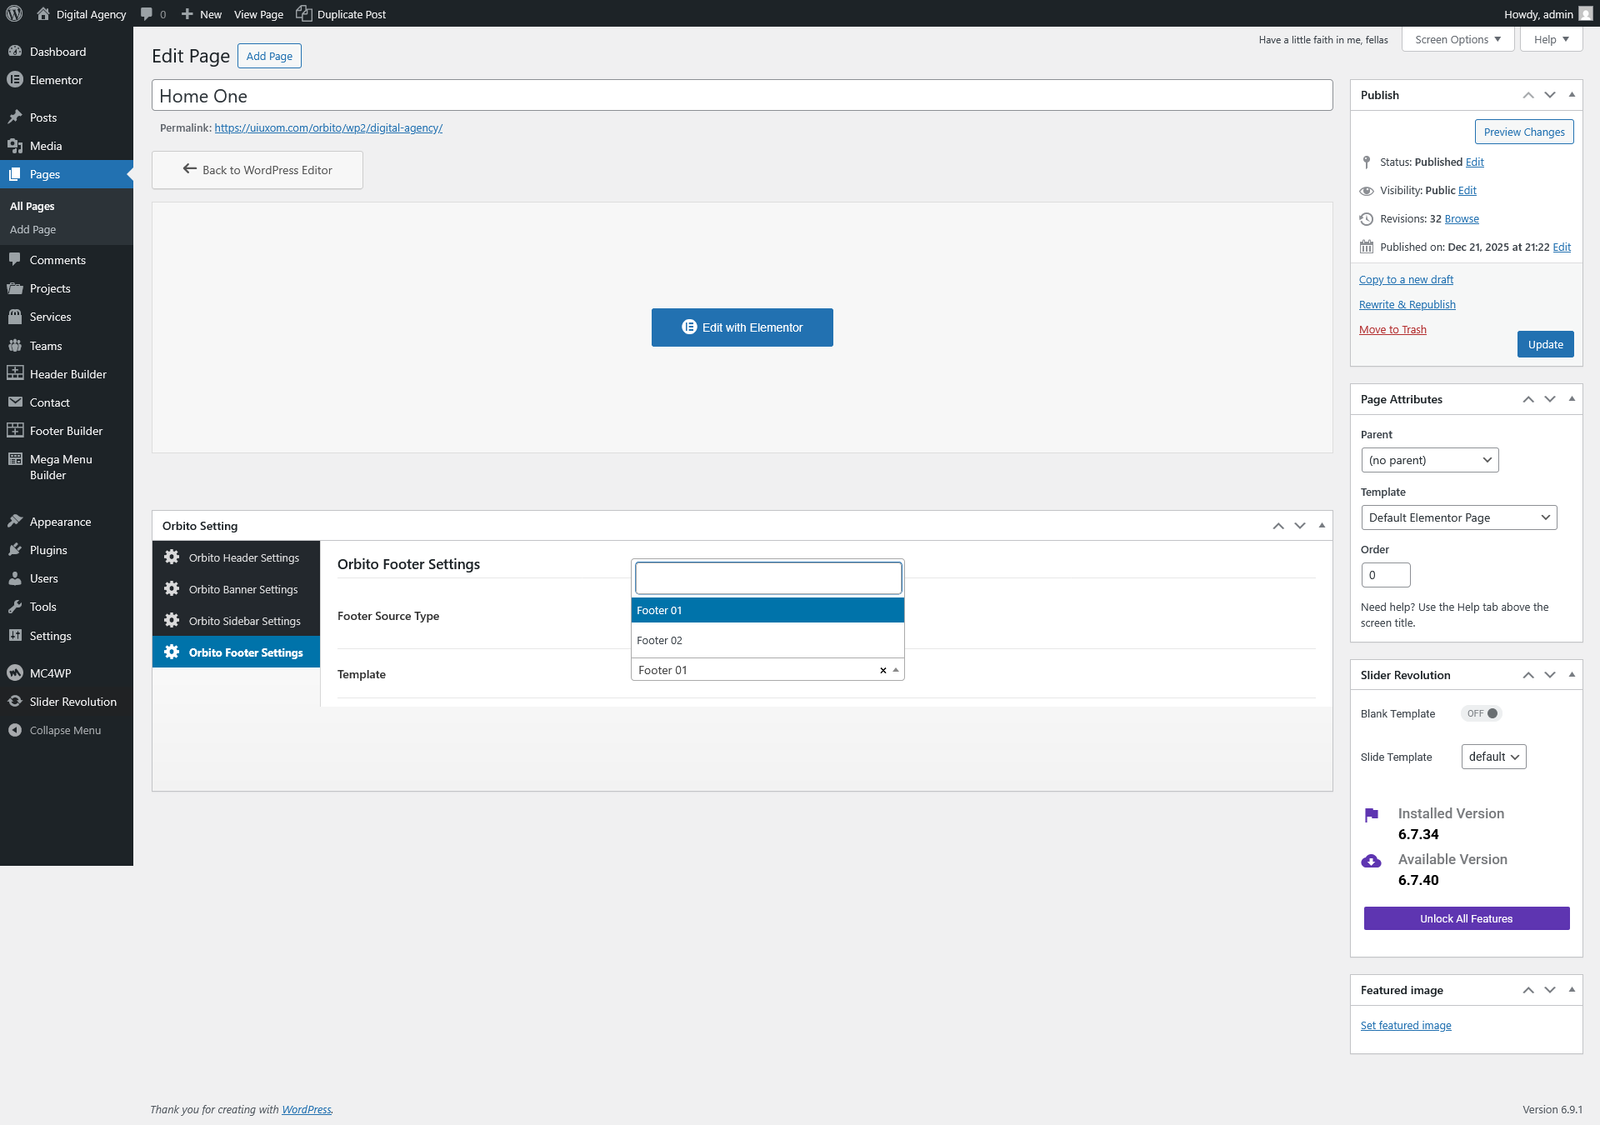
Dynamic Pages Settings
- Go to Pages → Edit Page
- Scroll Down here you will find the footer setting
- From the footer source click on elementor tab
- here you will find the created footer templates.
Video Tutorial
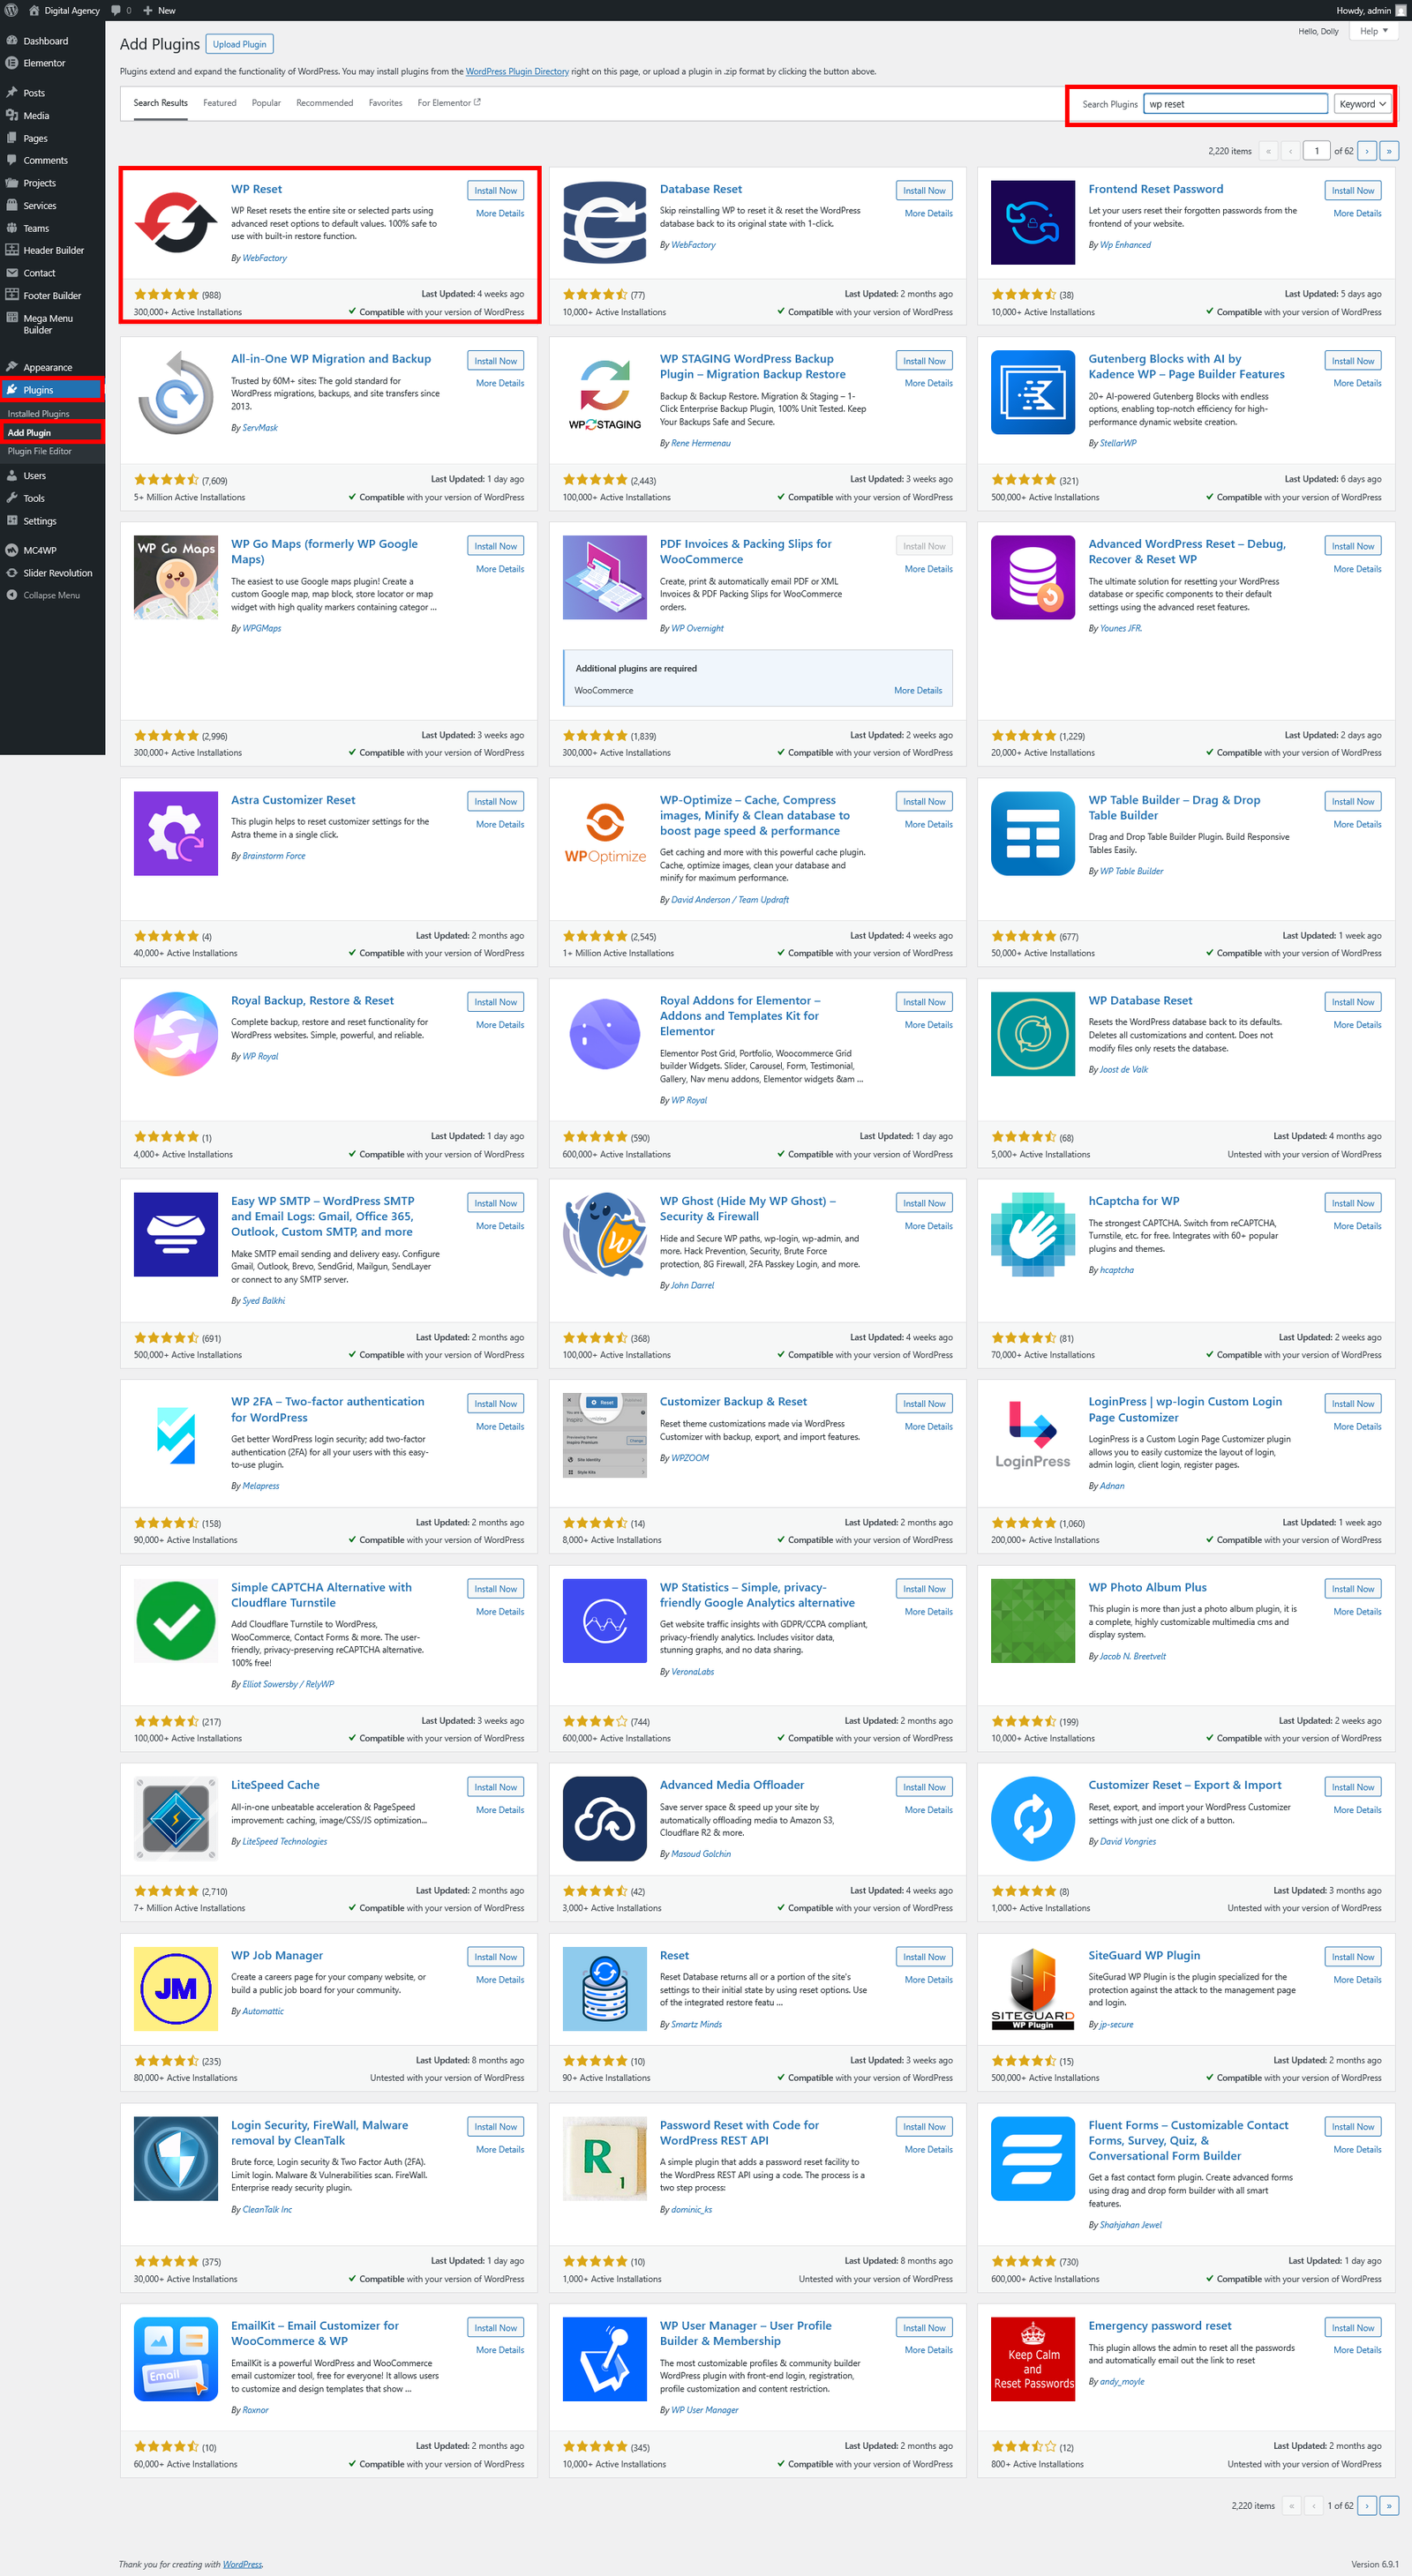
WP Reset Settings
After completing the demo import, a site reset is required before importing a new demo. Please follow the setup instructions below.
- Go to Plugins → Add New under the appearance menu
- In the search box, type "wp reset" and install the plugin
- Go to Tools → WP Reset
Video Tutorial
Custome Post - types
Below are the cutome post types which you could add data in theme.
Add Project's data in Projects custome post type.
Add Team's data in Team custome post type.
Add Service's data in Services custome post type.
Video Tutorial
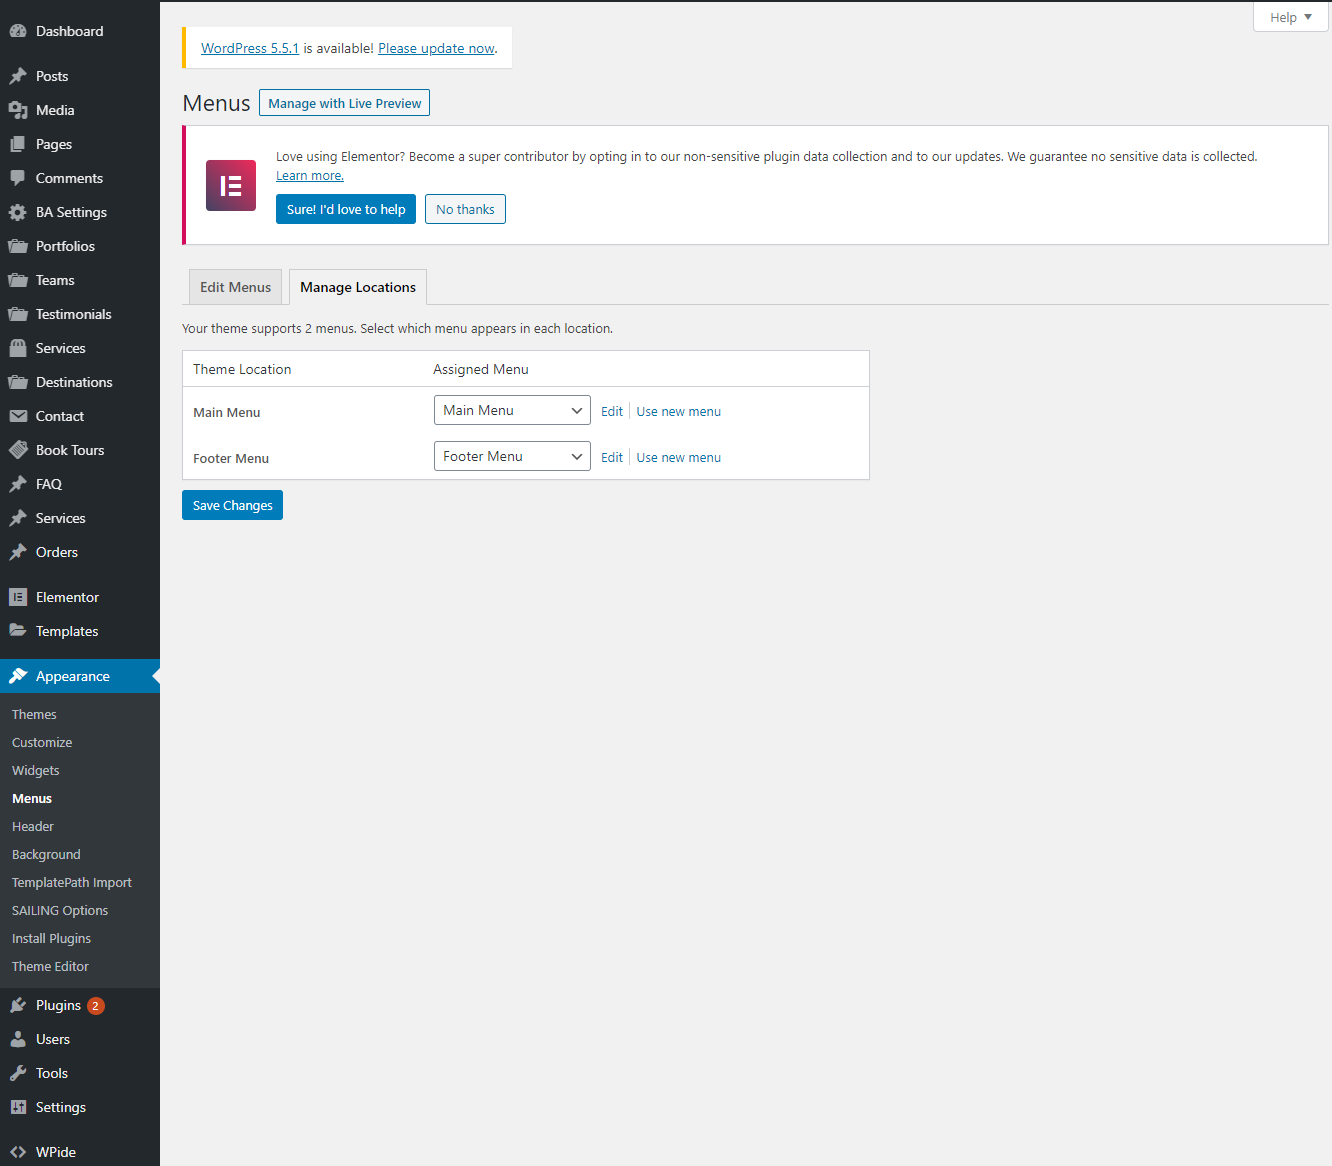
Setting & Setup Menu
After installation the Orbito and after dummy-content export, you need to select our main menu from WordPress admin → menus → theme locations please check below image and learn how to do.
Theme Options
We listed below all Orbito options. You can learn how we used Orbito WordPress theme options in below;
Go to Appearance > Orbito Options
In General Settings Panel; In general setting you will find Toggle button for disable/enable the preloader.In Logo Settings Panel; In Logo setting you will find uploader field for Favicon and logo image also the field for width and height of logo.
In Header Settings Panel; In Header setting you will find Header Styles and his option please select which one you want to use.
In Footer Settings Panel; In footer setting you will find Select field for footer styles, toggle button for disable/enable the Social Icons and the Copyright Text and Analytics / Scripts area.
In Page Settings Panel; Control your page structures (layouts), sidebar options and which pages you want to use for search page, archive page, author page and not found page.
In Sidebar Settings Panel; Add unlimited widgets area to the your theme.
In Import and Export Settings Panel; Import export and demo import options here.
Video Tutorial
Files and Sources
Fonts Used int the template are google fonts, you can find them on Google Fonts API
Fonts Used are :
Jost
Open Sans
File Used For Animation Effects :
wow.js (in js Folder)
appear.js (in js Folder)
animate.css (in css Folder)
Sliders Used Are :
Owl Carousel
Swiper Carousel
Slick Slider
Every Code is properly commented for Editing Ease.
Icons Used are :
Fontawsome Icons
https://fortawesome.github.io/Font-Awesome/
Orbito Icons
Flaticons.com
Version History
You can find the version history (changelog.txt) file on Orbito-full.zip folder or you can check changelog on theme sale page.
Once again, thank you so much for purchasing this theme. As I said at the beginning, I'd be glad to help you if you have any questions relating to this theme. No guarantees, but I'll do my best to assist. If you have a more general question relating to the themes on ThemeForest, you might consider visiting the forums and asking your question in the "Item Discussion" section.
Support
Please remember you have purchased a very affordable theme and you have not paid for a full-time web design agency. Occasionally we will help with small tweaks, but these requests will be put on a lower priority due to their nature. Support is also 100% optional and we provide it for your connivence, so please be patient, polite and respectful.
Please visit our support forum or ask question @uiuxom
Support for my items includes:
- Responding to questions or problems regarding the item and its features
- Fixing bugs and reported issues
- Providing updates to ensure compatibility with new software versions
Item support does not include:
- Customization and installation services
- Support for third party software and plug-ins
Before seeking support, please...
- Make sure your question is a valid Theme Issue and not a customization request.
- Make sure you have read through the documentation and any related video guides before asking support on how to accomplish a task.
- Make sure to double check the theme FAQs.
- Try disabling any active plugins to make sure there isn't a conflict with a plugin. And if there is this way you can let us know.
- If you have customized your theme and now have an issue, back-track to make sure you didn't make a mistake. If you have made changes and can't find the issue, please provide us with your changelog.
- Almost 80% of the time we find that the solution to people's issues can be solved with a simple "Google Search". You might want to try that before seeking support. You might be able to fix the issue yourself much quicker than we can respond to your request.
- Make sure to state the name of the theme you are having issues with when requesting support via ThemeForest.
Once again, thank you so much for purchasing this theme. As I said at the beginning, I'd be glad to help you if you have any questions relating to this theme. No guarantees, but I'll do my best to assist. If you have any queries, please feel free to contact us at Support Center.
Email Us at : uiuxom@gmail.com